


Step-by-step... bringing it to completion
Step-by-step... bringing it to completion

"First comes the initial idea for a work - what the artist desires to portray, to bring into concrete manifestation.
In order to fulfill this task, [they] must begin to build, to organise."
Nicolai Fechin
Dear Subscribers,
I hope you're having a good week and managing to get some painting time in!
Firstly, I'd like to inform you about an upcoming live, online, alla prima class, scheduled for Sunday 28th April from 4 to 7pm UK time (GMT+1).
For free subscribers to my newsletter, the price is $70 / £52. Paying subscribers enjoy a 25% discount, reducing the price to $52 / £39.
If you're currently a free subscriber and wish to avail of the discount, you'll need to upgrade to a paid subscription before registering for the class.
Additionally, I'll offer a complimentary 3-month subscription to my newsletter to the first free subscriber who registers for the workshop.
The subject of the class is open for discussion, but I anticipate that most participants will prefer a floral subject. However, feel free to let me know if you have a different preference.
During the class, I'll conduct a live painting demonstration and address any questions you may have.
If you'd like to paint along with me, that would be fantastic! I'll do my best to provide group feedback on your work if time permits during the class.
If you're interested in joining, simply reply to this email!
After the positive response to my last walk-through of the daffodil painting, I've got another step-by-step to share with you. I'll try once again to delve into some of my thought processes as far as I can recall. Often when I am painting, I am not explicitly aware of my thought process. I think this is probably the case with all kinds of endeavours where physical skills must be learnt - hopefully, if one is careful in how we learn, we won't pick up too many bad habits.
Writing down my thoughts about these still images at different stages seems to be a good way to get an overview of my process.
For free subscribers, there is a step-by-step description of my process, and for paying subscribers, there is a captioned video which can be watched at the end of this newsletter.
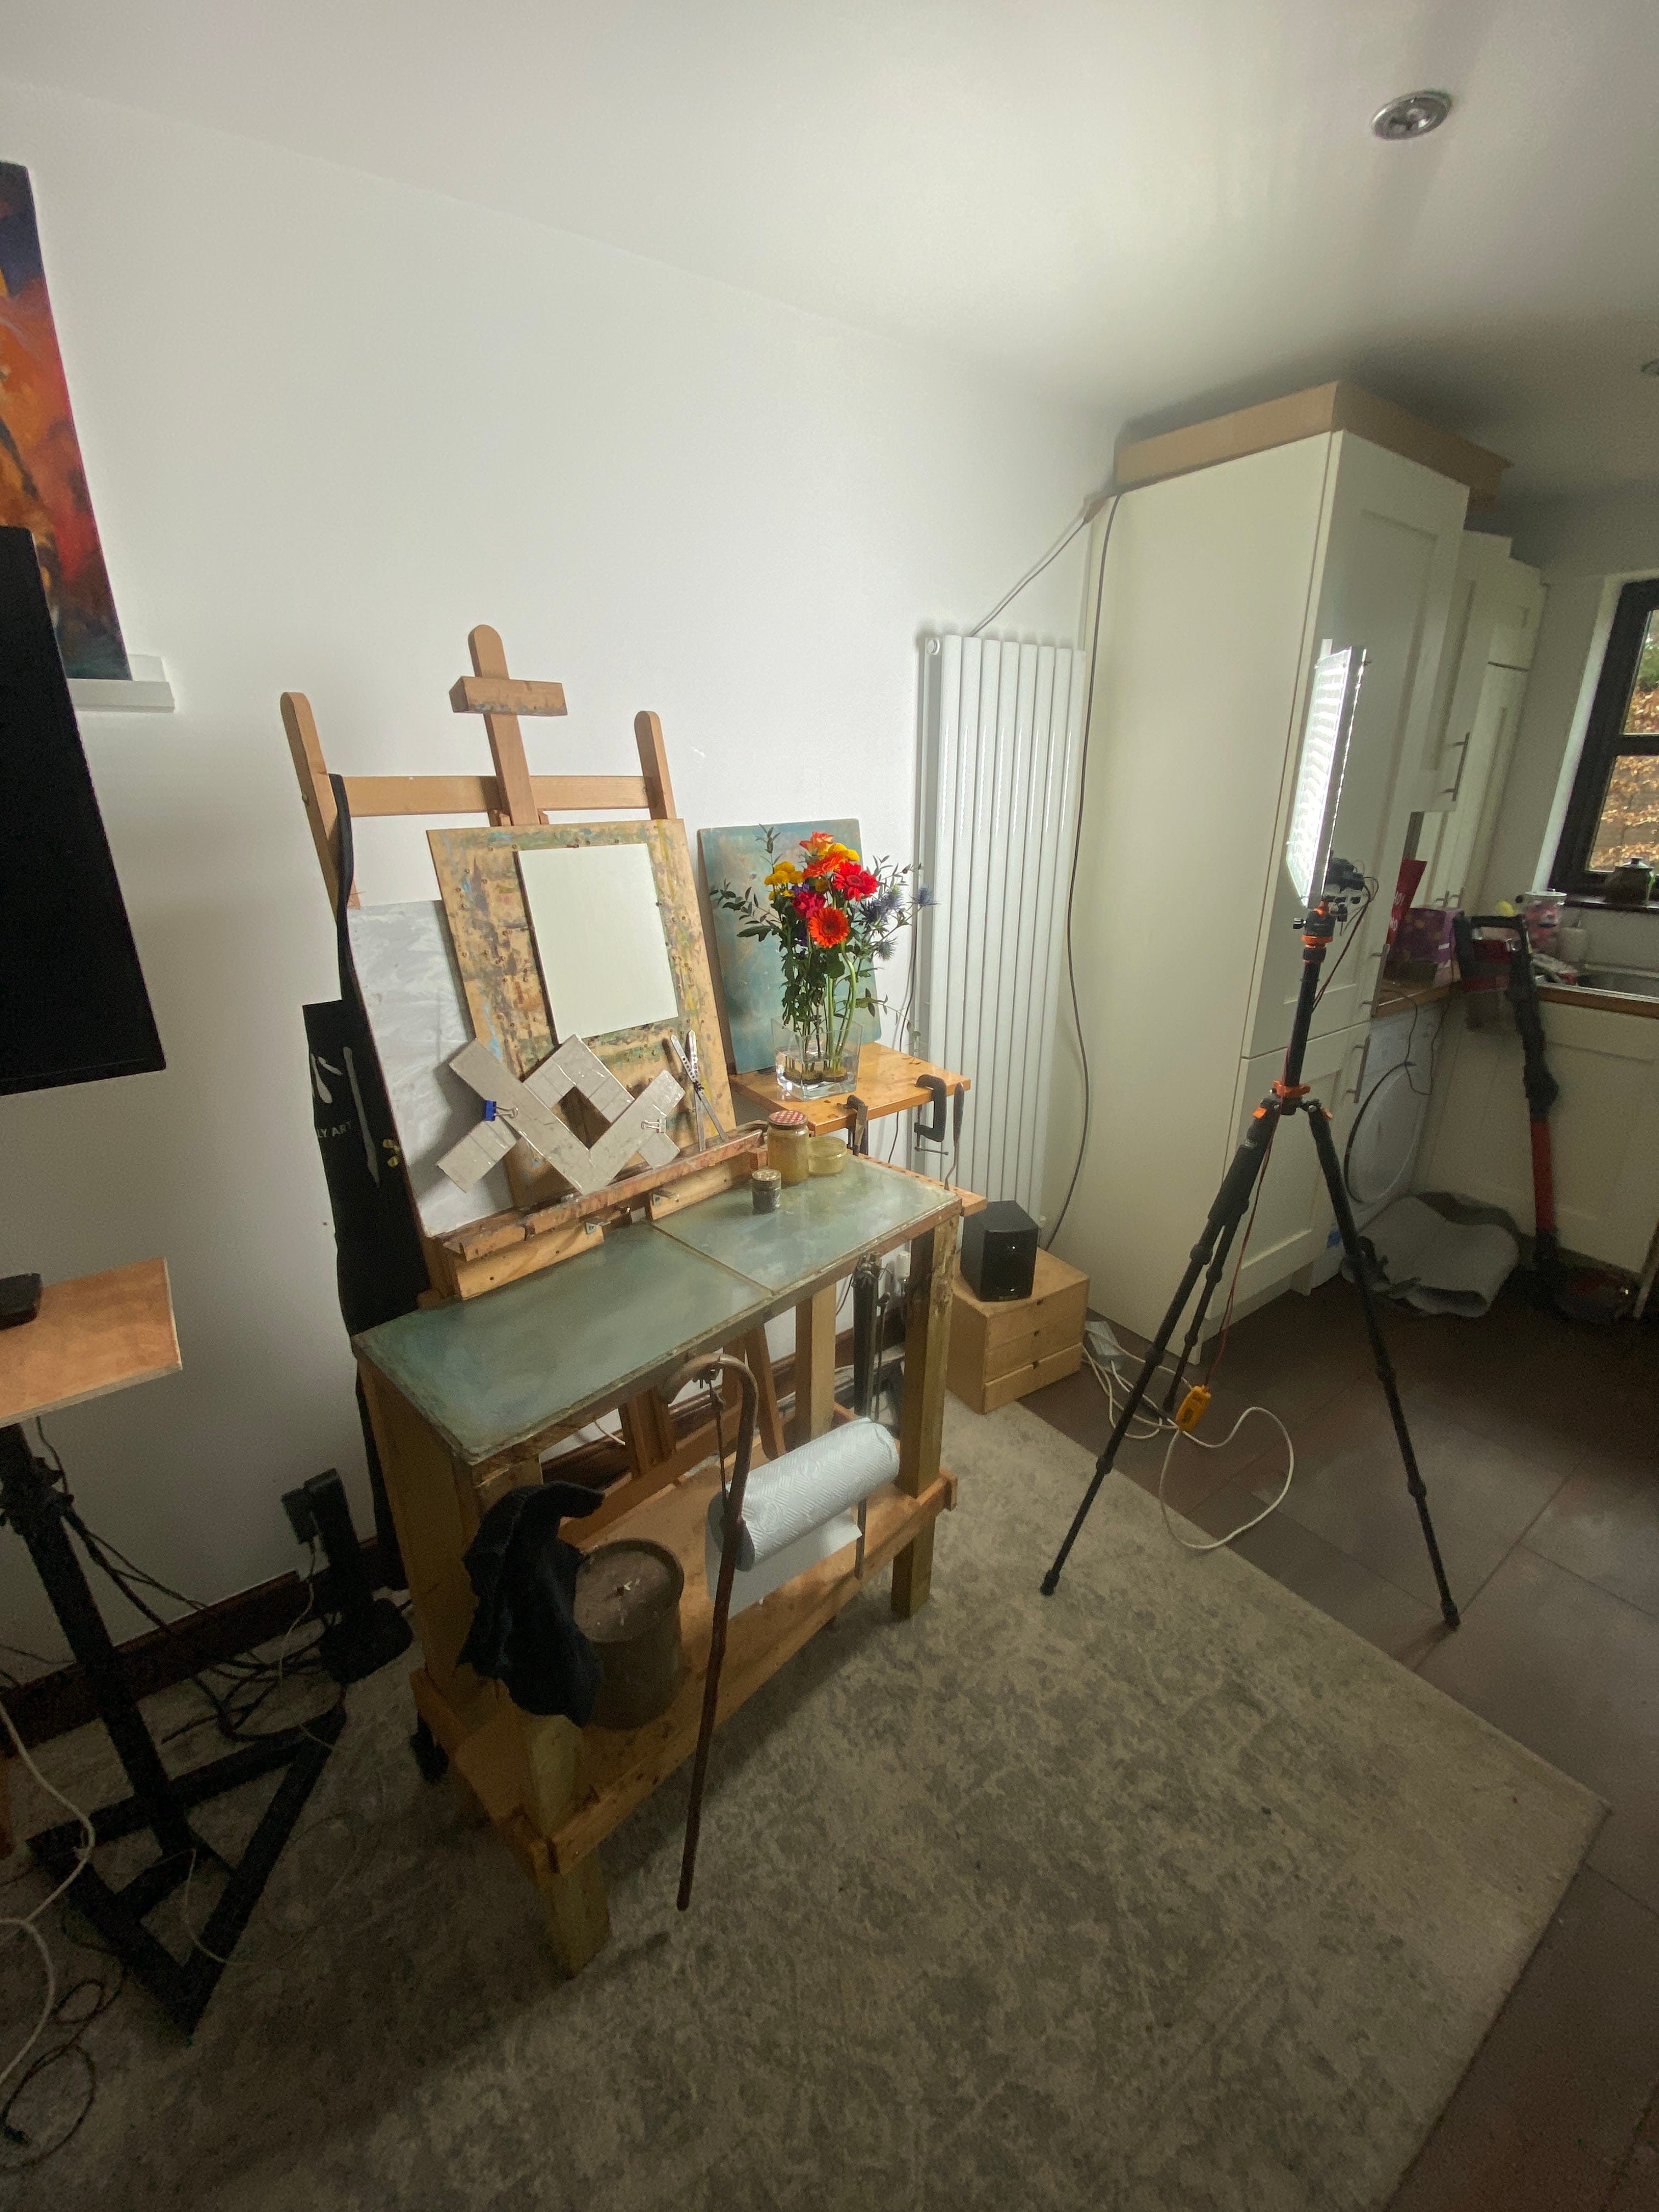
Above, you can see my set-up: the subject consisting of highly chromatic gerbera, an LED light panel, easel with oil-primed HDF panel, a composition-finder, and calipers.
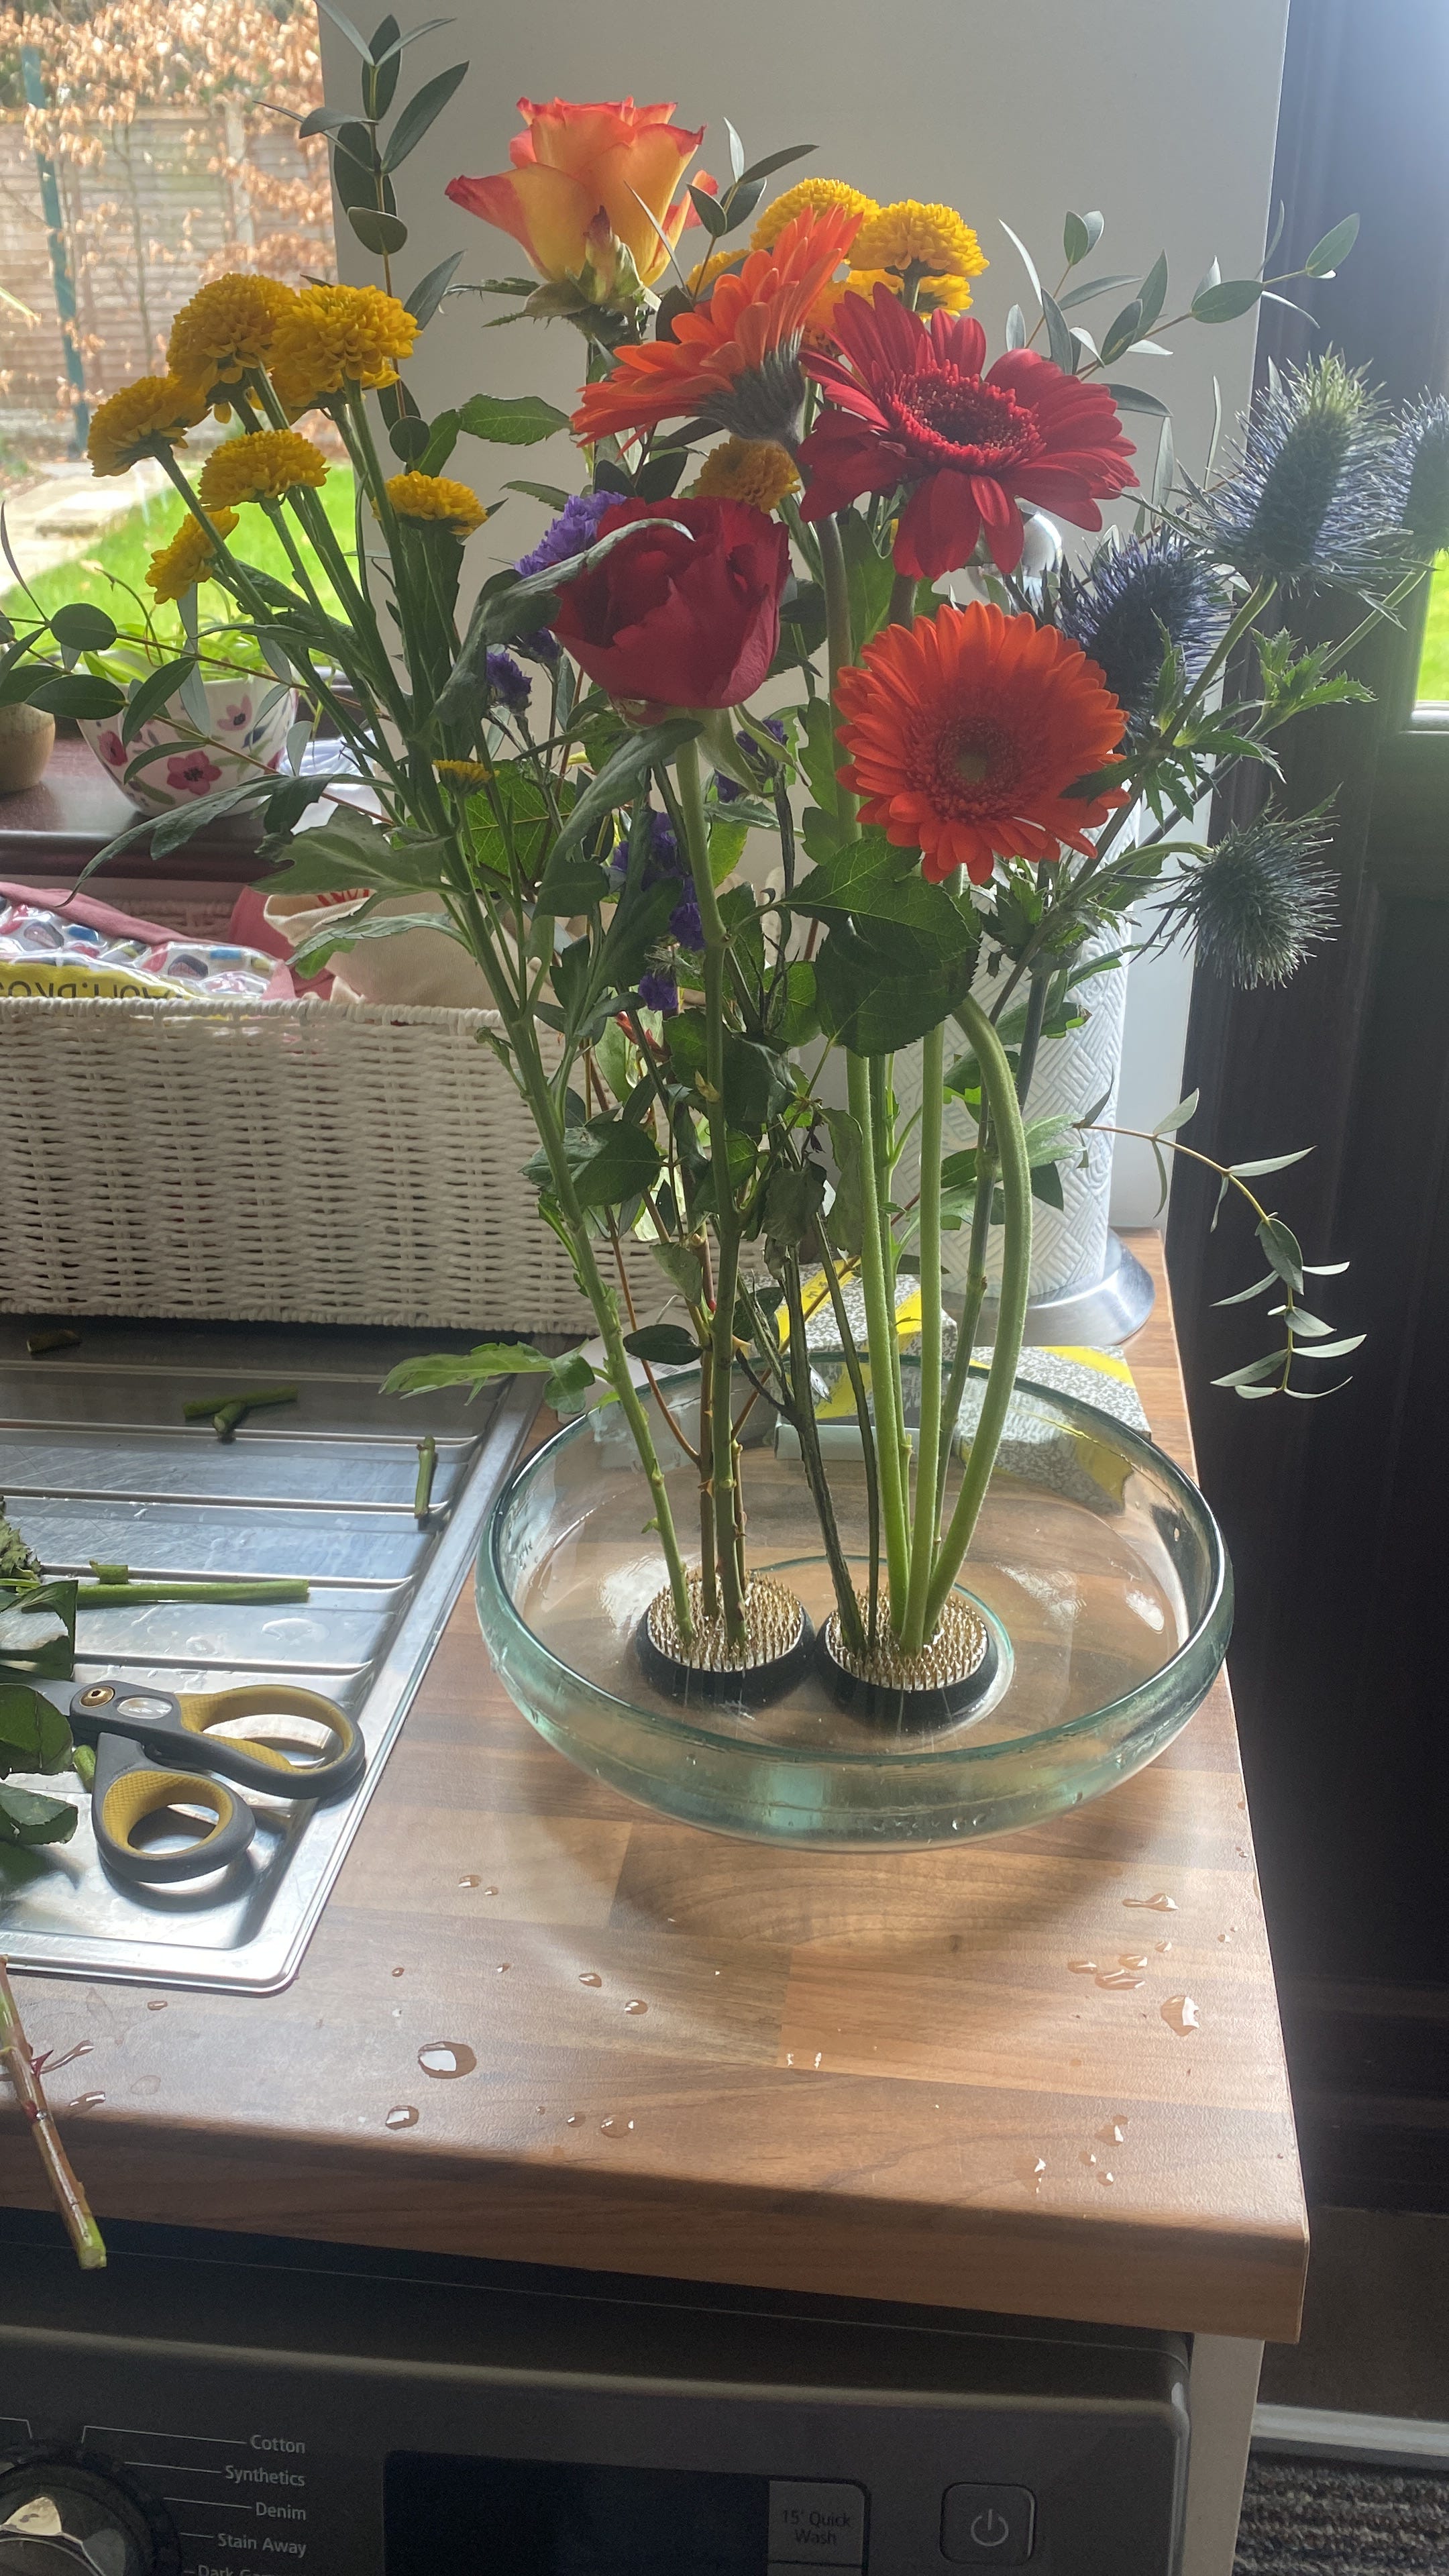
Regarding the subject, I discovered a new way to help arrange the stems which allows for fairly precise positioning. In the photo above, in the dish, are round 'frog pins'. They are surprisingly heavy, so should be good for holding most arrangements except perhaps sunflowers. This is my first time using these after seeing them on a fellow artist's Instagram post.


Above are a series of photos showing my set-up in more detail.
From top left to bottom right:
You can see my palette box, which I use to store paint between sessions. There is a strip of paper towel infused with a few drops of clove oil. The clove oil slows the rate of paint drying so it can remain workable for weeks. Tip: don’t get clove oil into your paint as it will never dry!
This shows my brush selection. Mainly I use Rosemary & Co. Ivories extra long flats, sizes 4-6. I use between 4 - 6 of these brushes depending on the range of hues I will need for a painting. If I’m using six, then 2 will be for reds, 2 for yellows, and 2 for blue hues. This way I can keep my mixtures relatively clean. Each set of two is then divided into darks and lights. In addition, I also have one or two soft brushes, which are the Eclipse Combers, mainly used for edge work.
Here you see my composition finder made from 2 pieces of L-shaped card. The proportions can easily be adjusted and fixed with a couple of paper clips. Also shown are some homemade calipers, which are strips of aluminium drilled with holes and then fixed together with a wing nut.
This is a small jar which contains the medium I use. This is a mixture of stand oil (linseed), walnut alkyd oil, and OMS in proportions of around 1:1:5. I also add about 2% of cobalt drier per 100ml of medium to accelerate drying time of the paint. The alkyd increases the gloss of paint films (so reduces ‘matting’ of paint films as they dry) as well as slightly increasing drying rate. The bigger jar contains straight walnut oil, which is used as a solvent for cleaning brushes as I work. This is used instead of OMS in the studio to cut down on volatile fumes. The two little dishes are where I work the walnut into the brush when cleaning. Unlike OMS, paint will tend to stay suspended in the walnut oil so I don’t clean into the large jar of oil as it would quickly become a jar of very muddy oil.
This shows the final set-up of the flowers for the composition. I can often spend one or more hours arranging the flowers or still life subject. It’s all part of the ‘painting’ process!
Here you can see the way I typically set out my paints. Approximately from right left is light through to dark values and also yellow, red, blue. On the left are greys which are usually made from piles of mixtures that's left over at the end of a session. However you choose to set out your palette, it's probably best to stick to the same layout to make mixing more efficient. Incidentally, the palette is made of glass which has a neutral grey backing to make value and colour estimation easier. The split down the middle is simply because I had two pieces of glass spare from some other project.
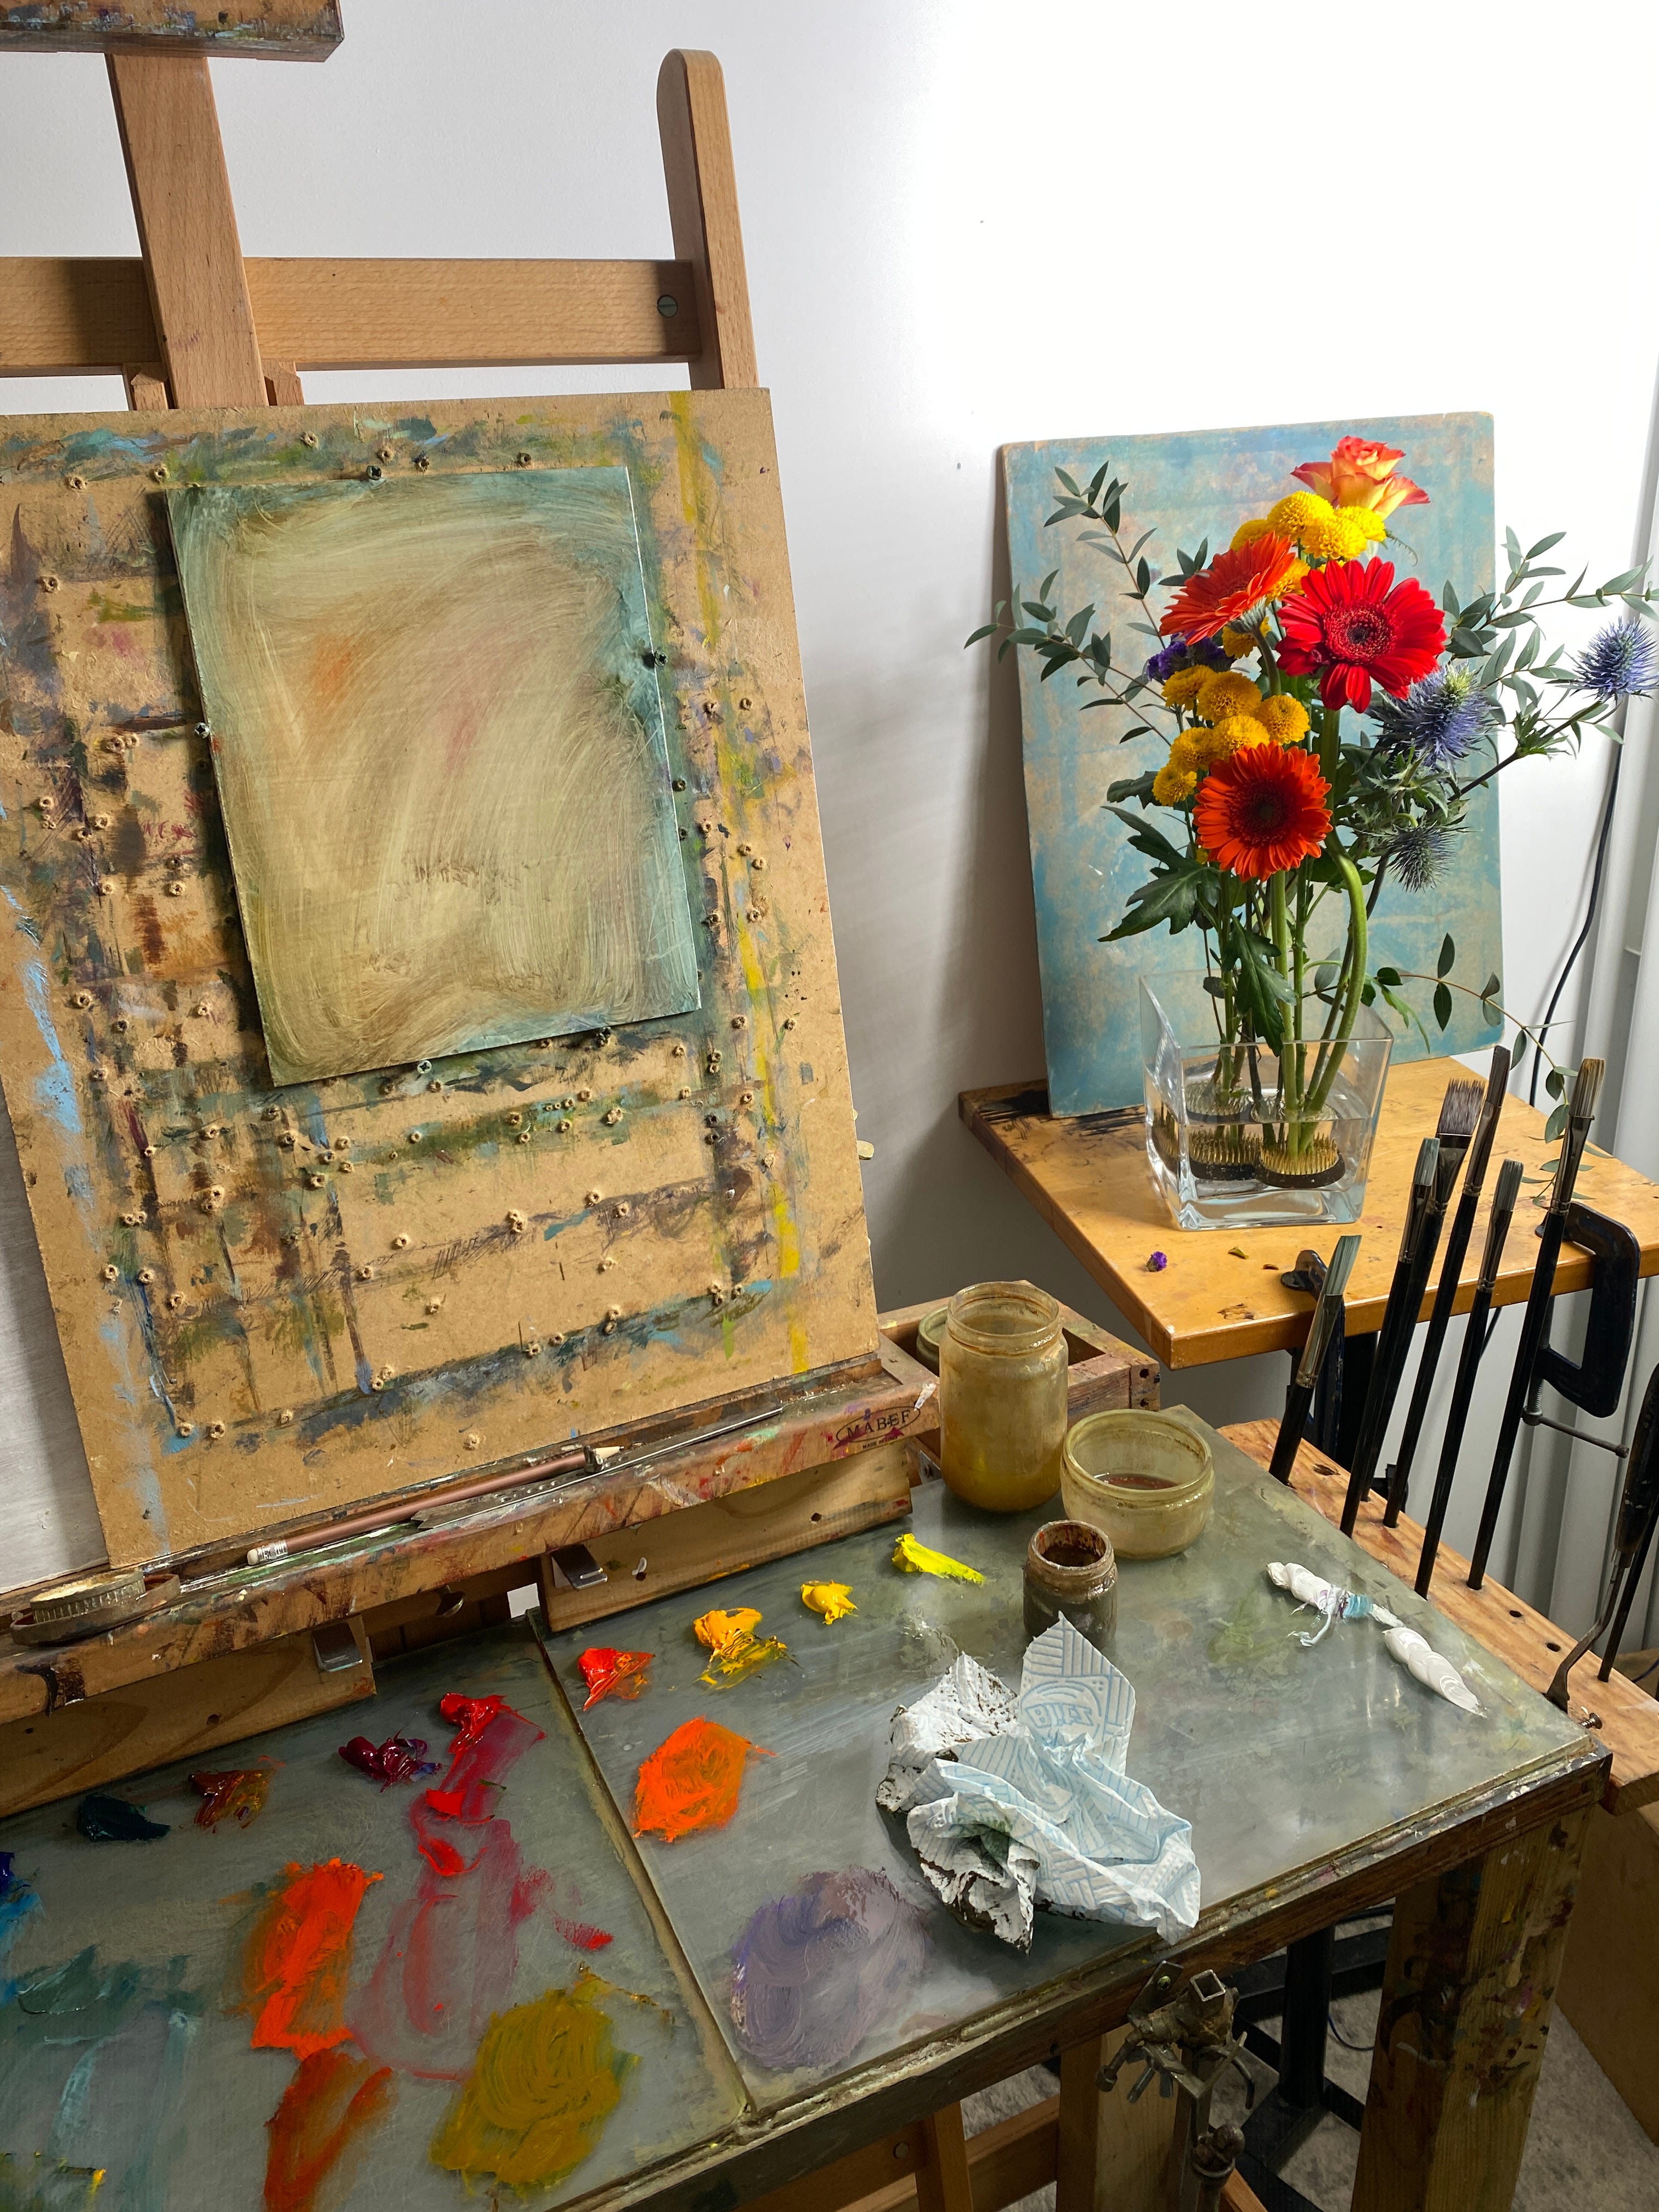
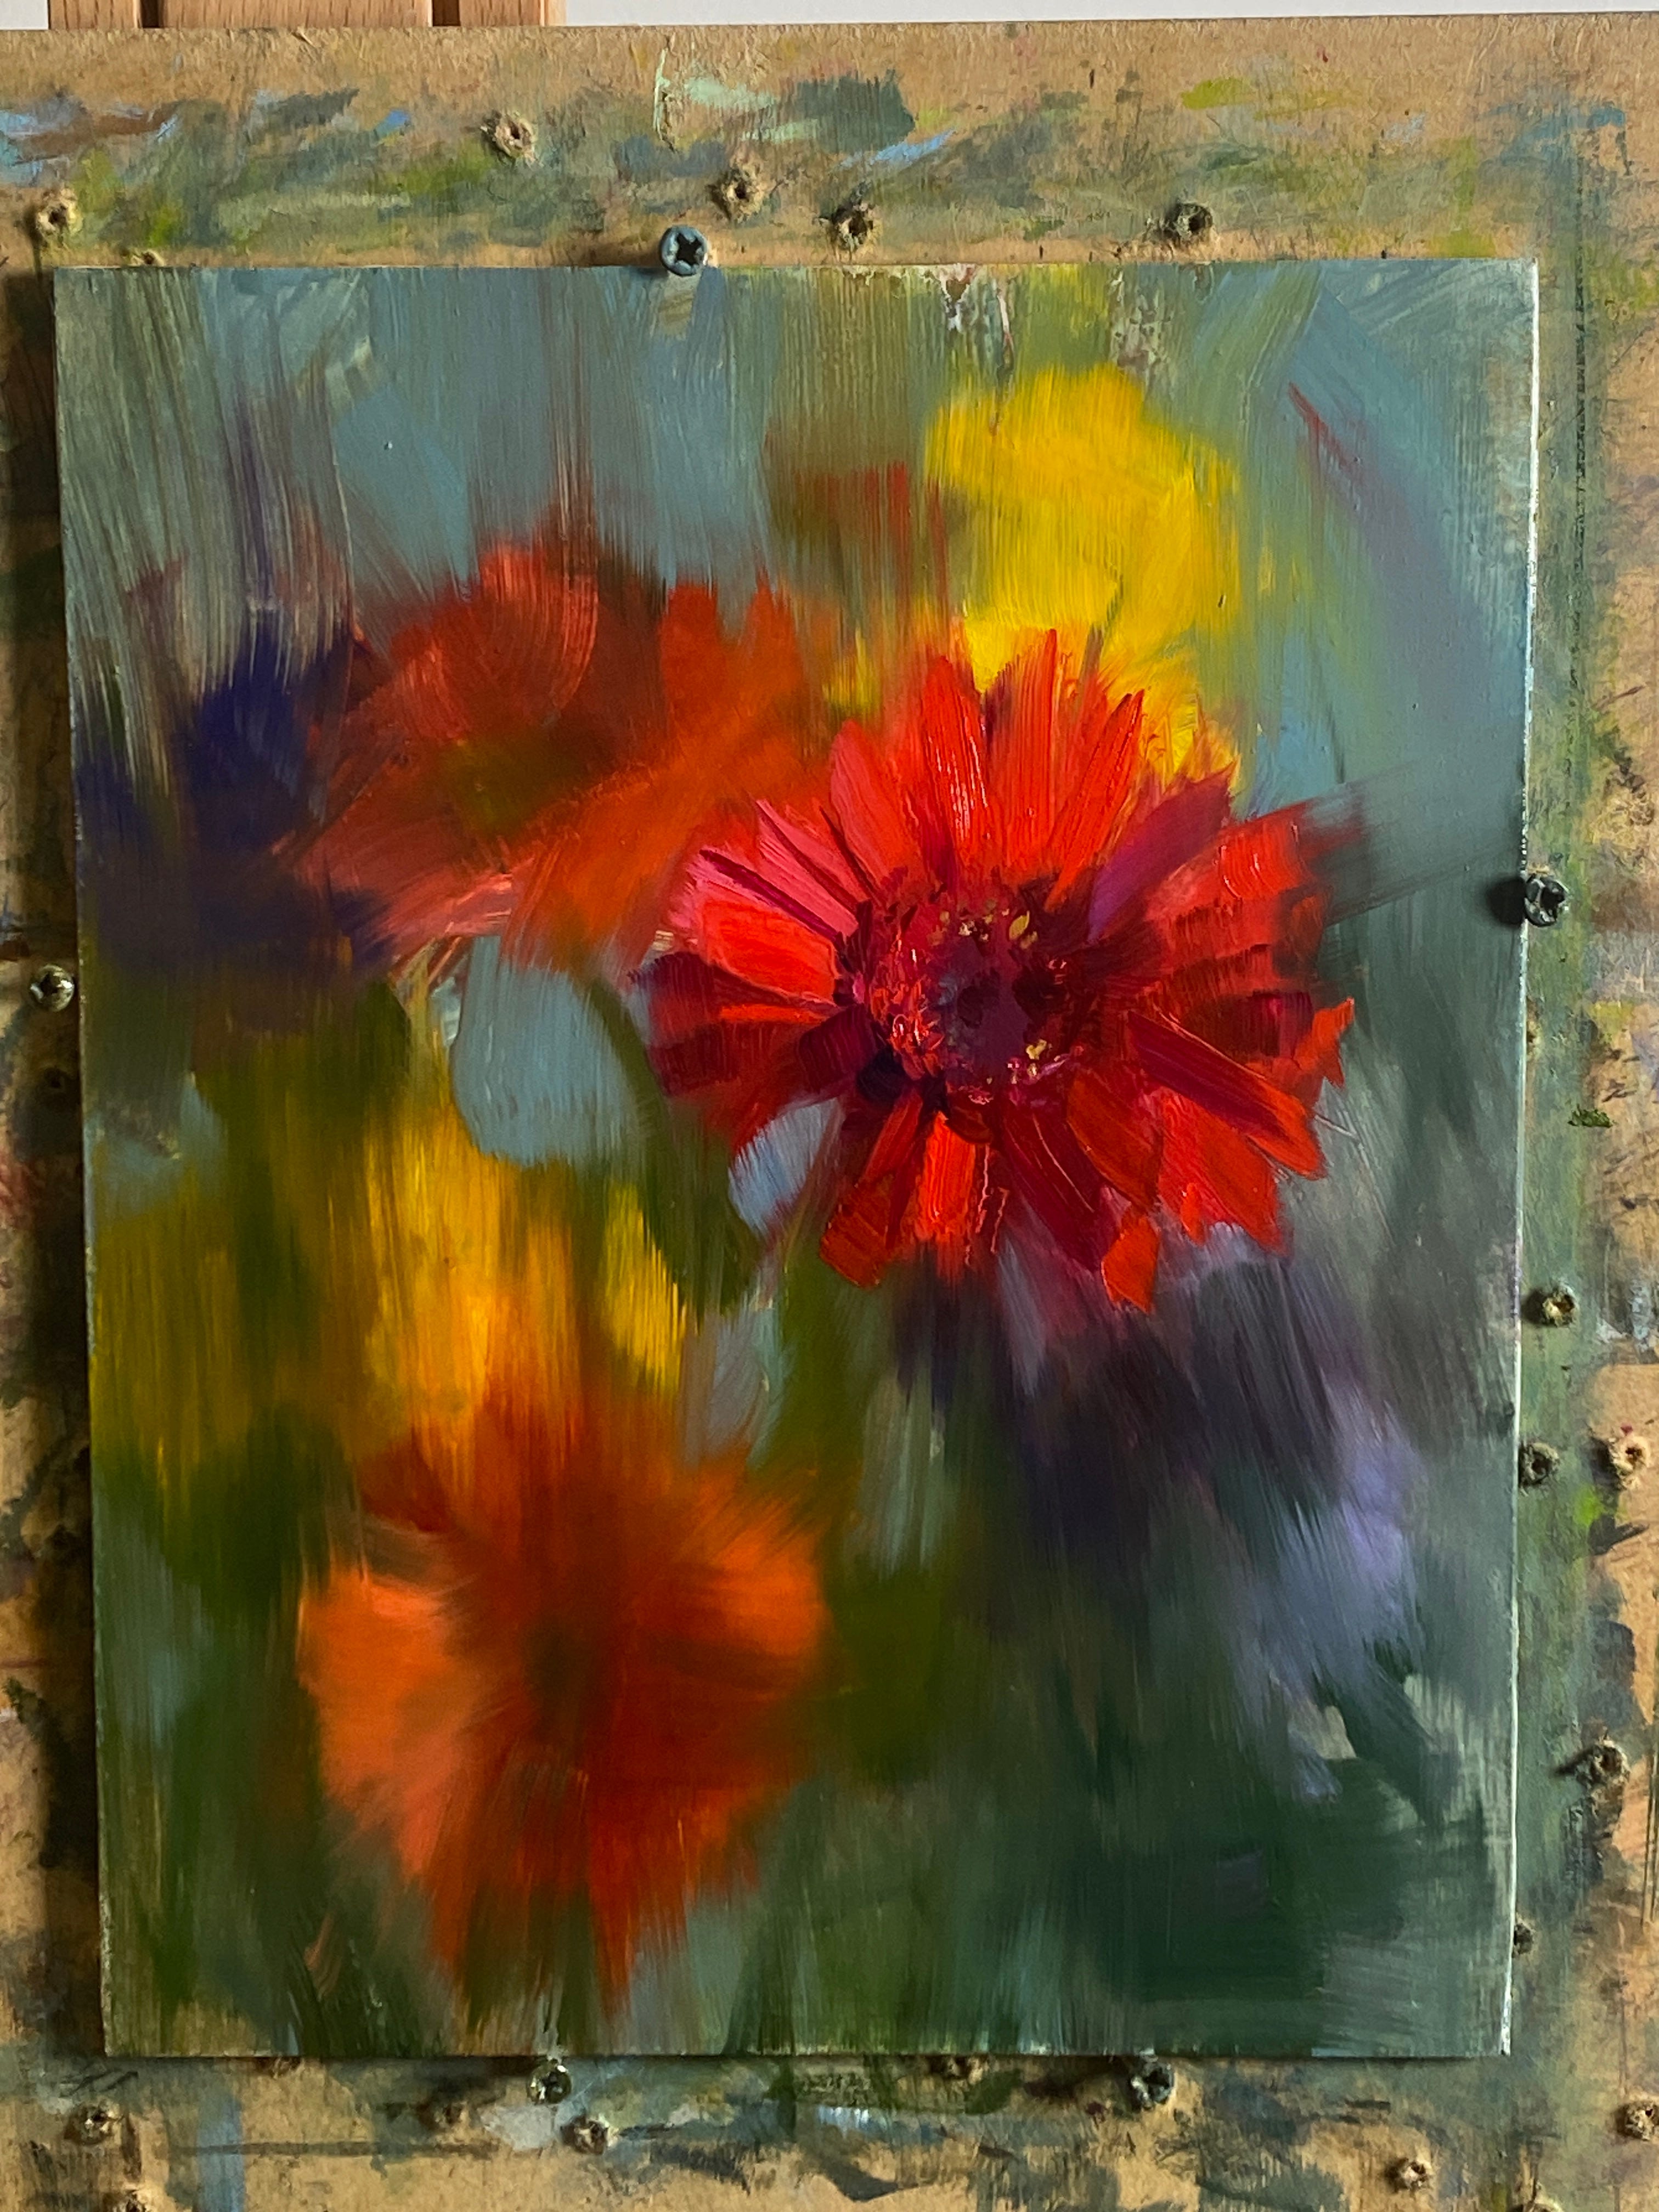
Above, you can see the beginning of my second attempt at underpainting. The first attempt was scrubbed because the composition wasn't quite right—the shapes I laid down were in the 'wrong' position. It's better to restart than carry on if you notice such an issue to avoid even greater regret later!
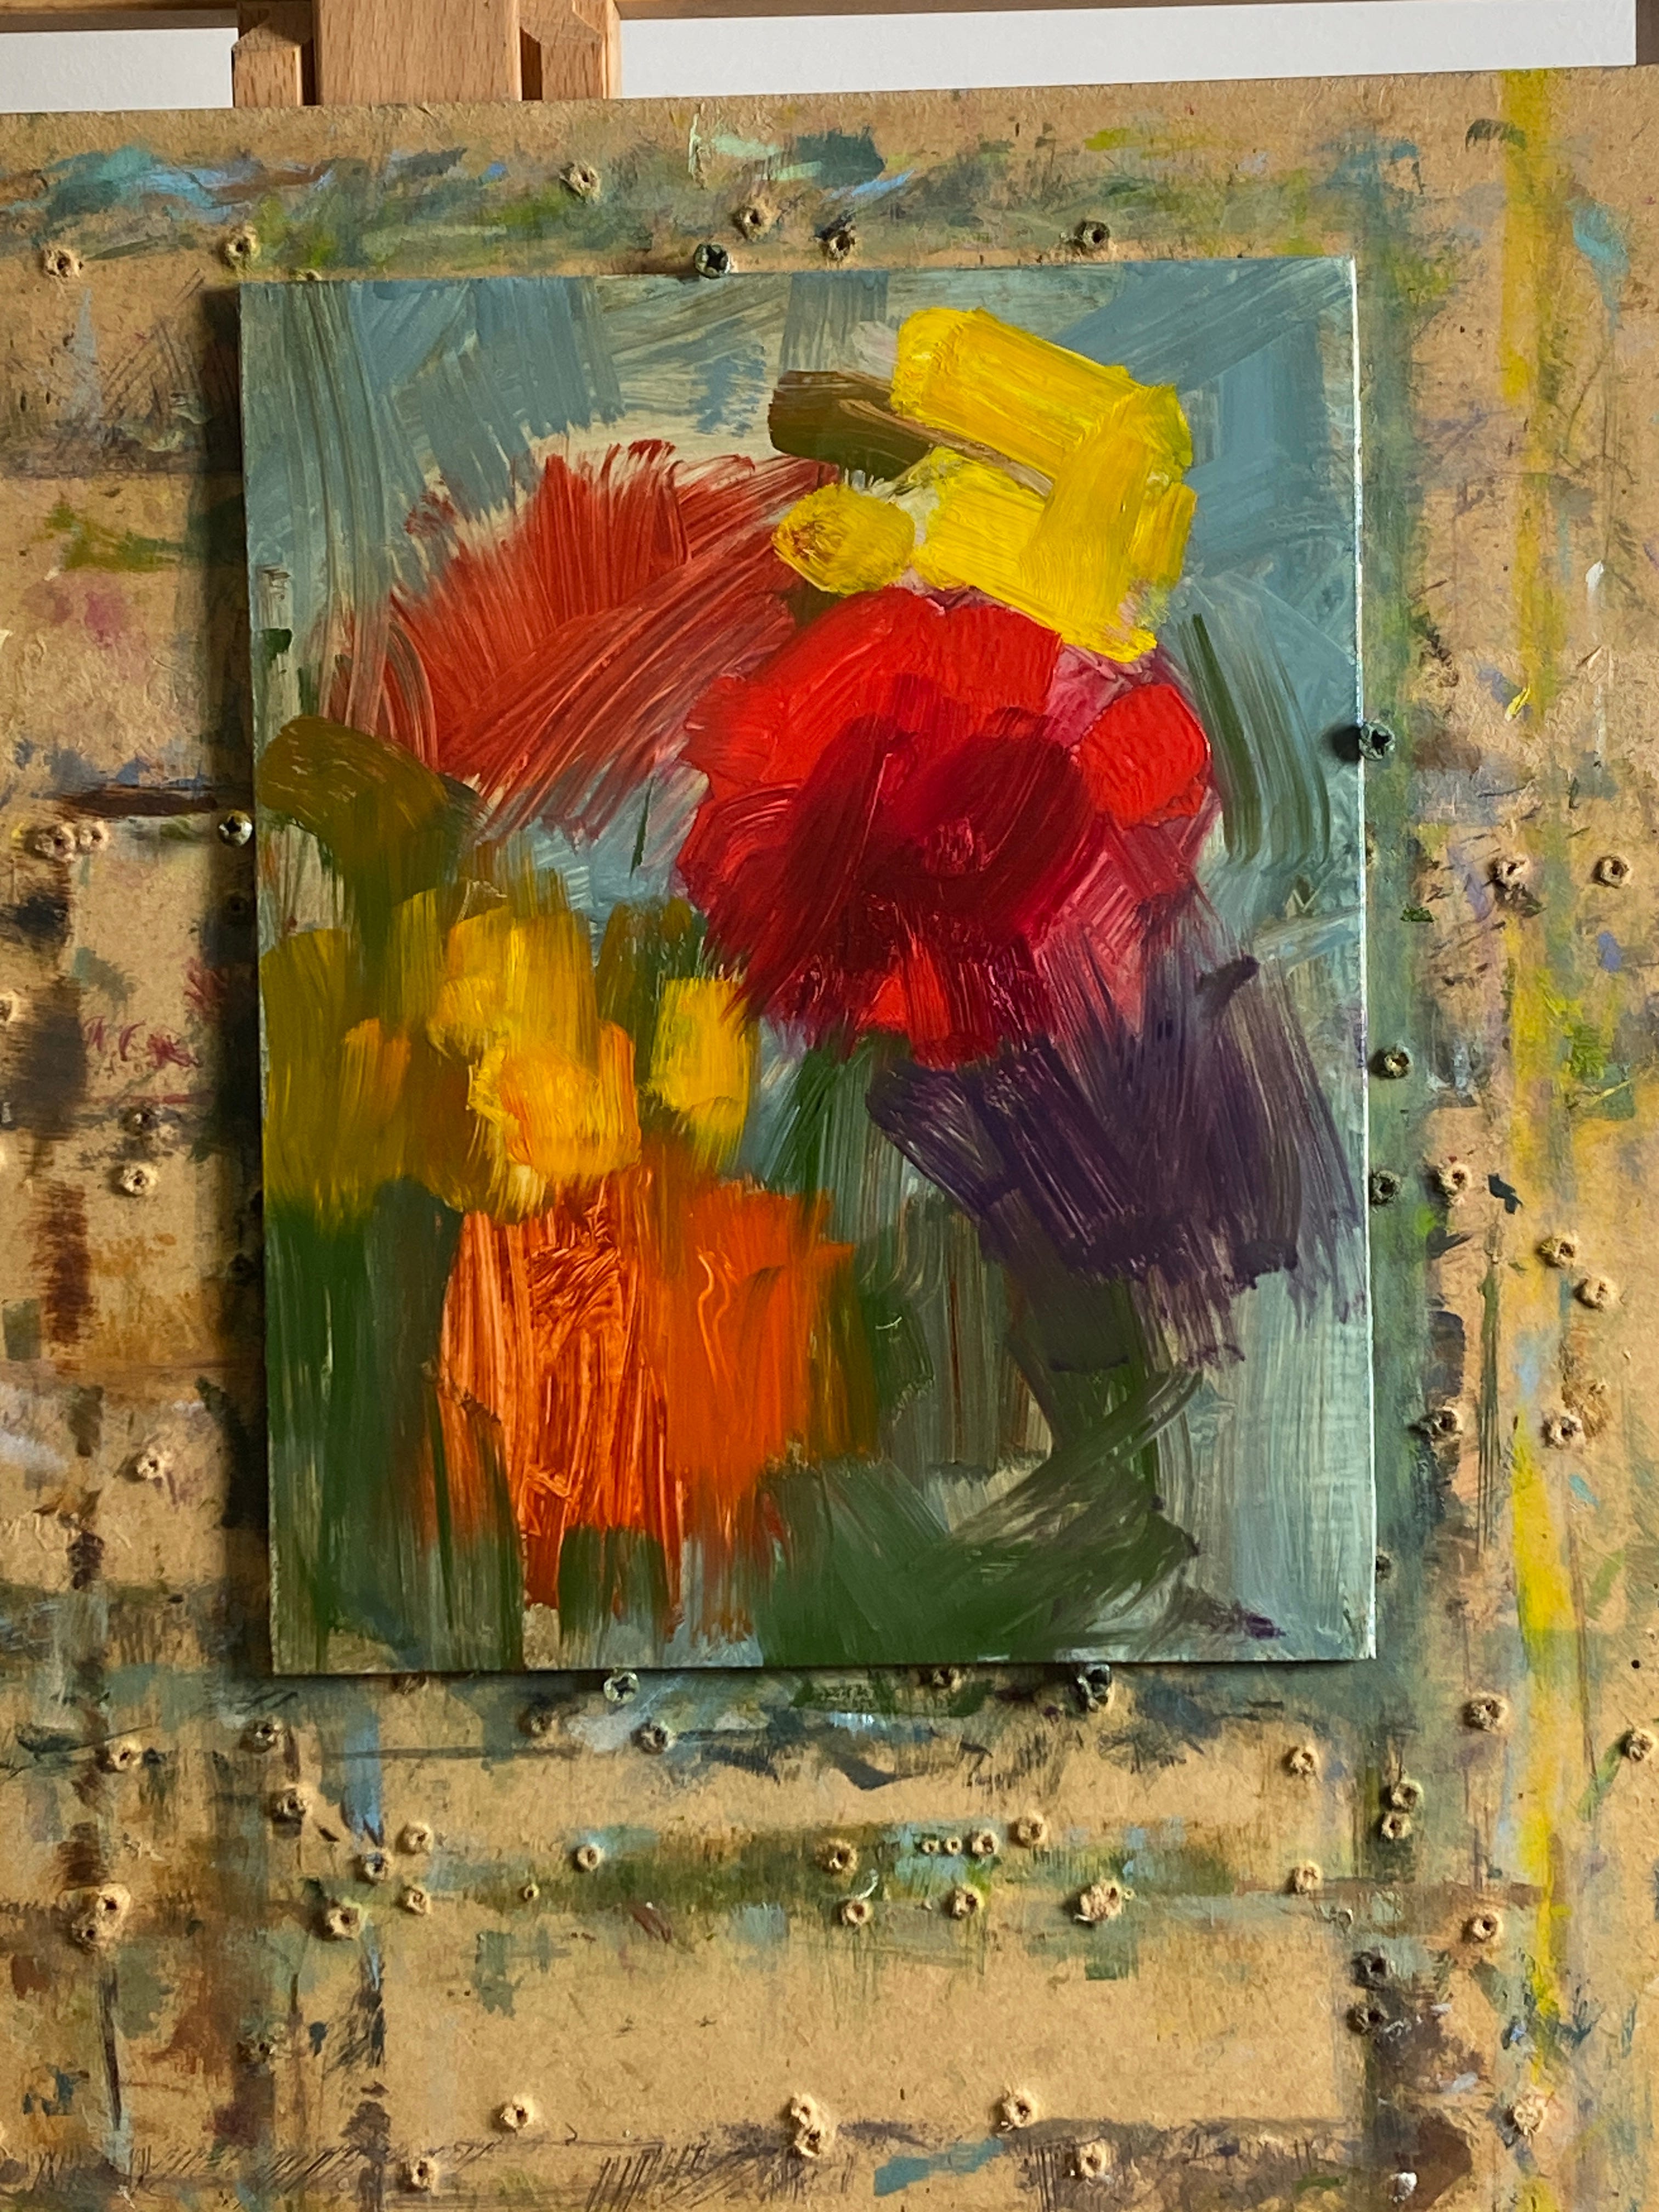
Above, you can see the basic block-in where I've indicated the range of hue and chroma, but not so much the full value range. This goes against my usual advice to establish the value range first, e.g., darkest dark and lightest light. The problem with highly chromatic subjects like this is that you need to establish the chroma early on, I think, to avoid getting in a situation where you need to lighten (by adding white) to get correct value relationships, which has the undesirable effect of reducing chroma. Also, having a highly chromatic underpainting on a white ground (in contrast to a ground tinted with an earth colour) also helps to maximise the greatest chroma achievable.

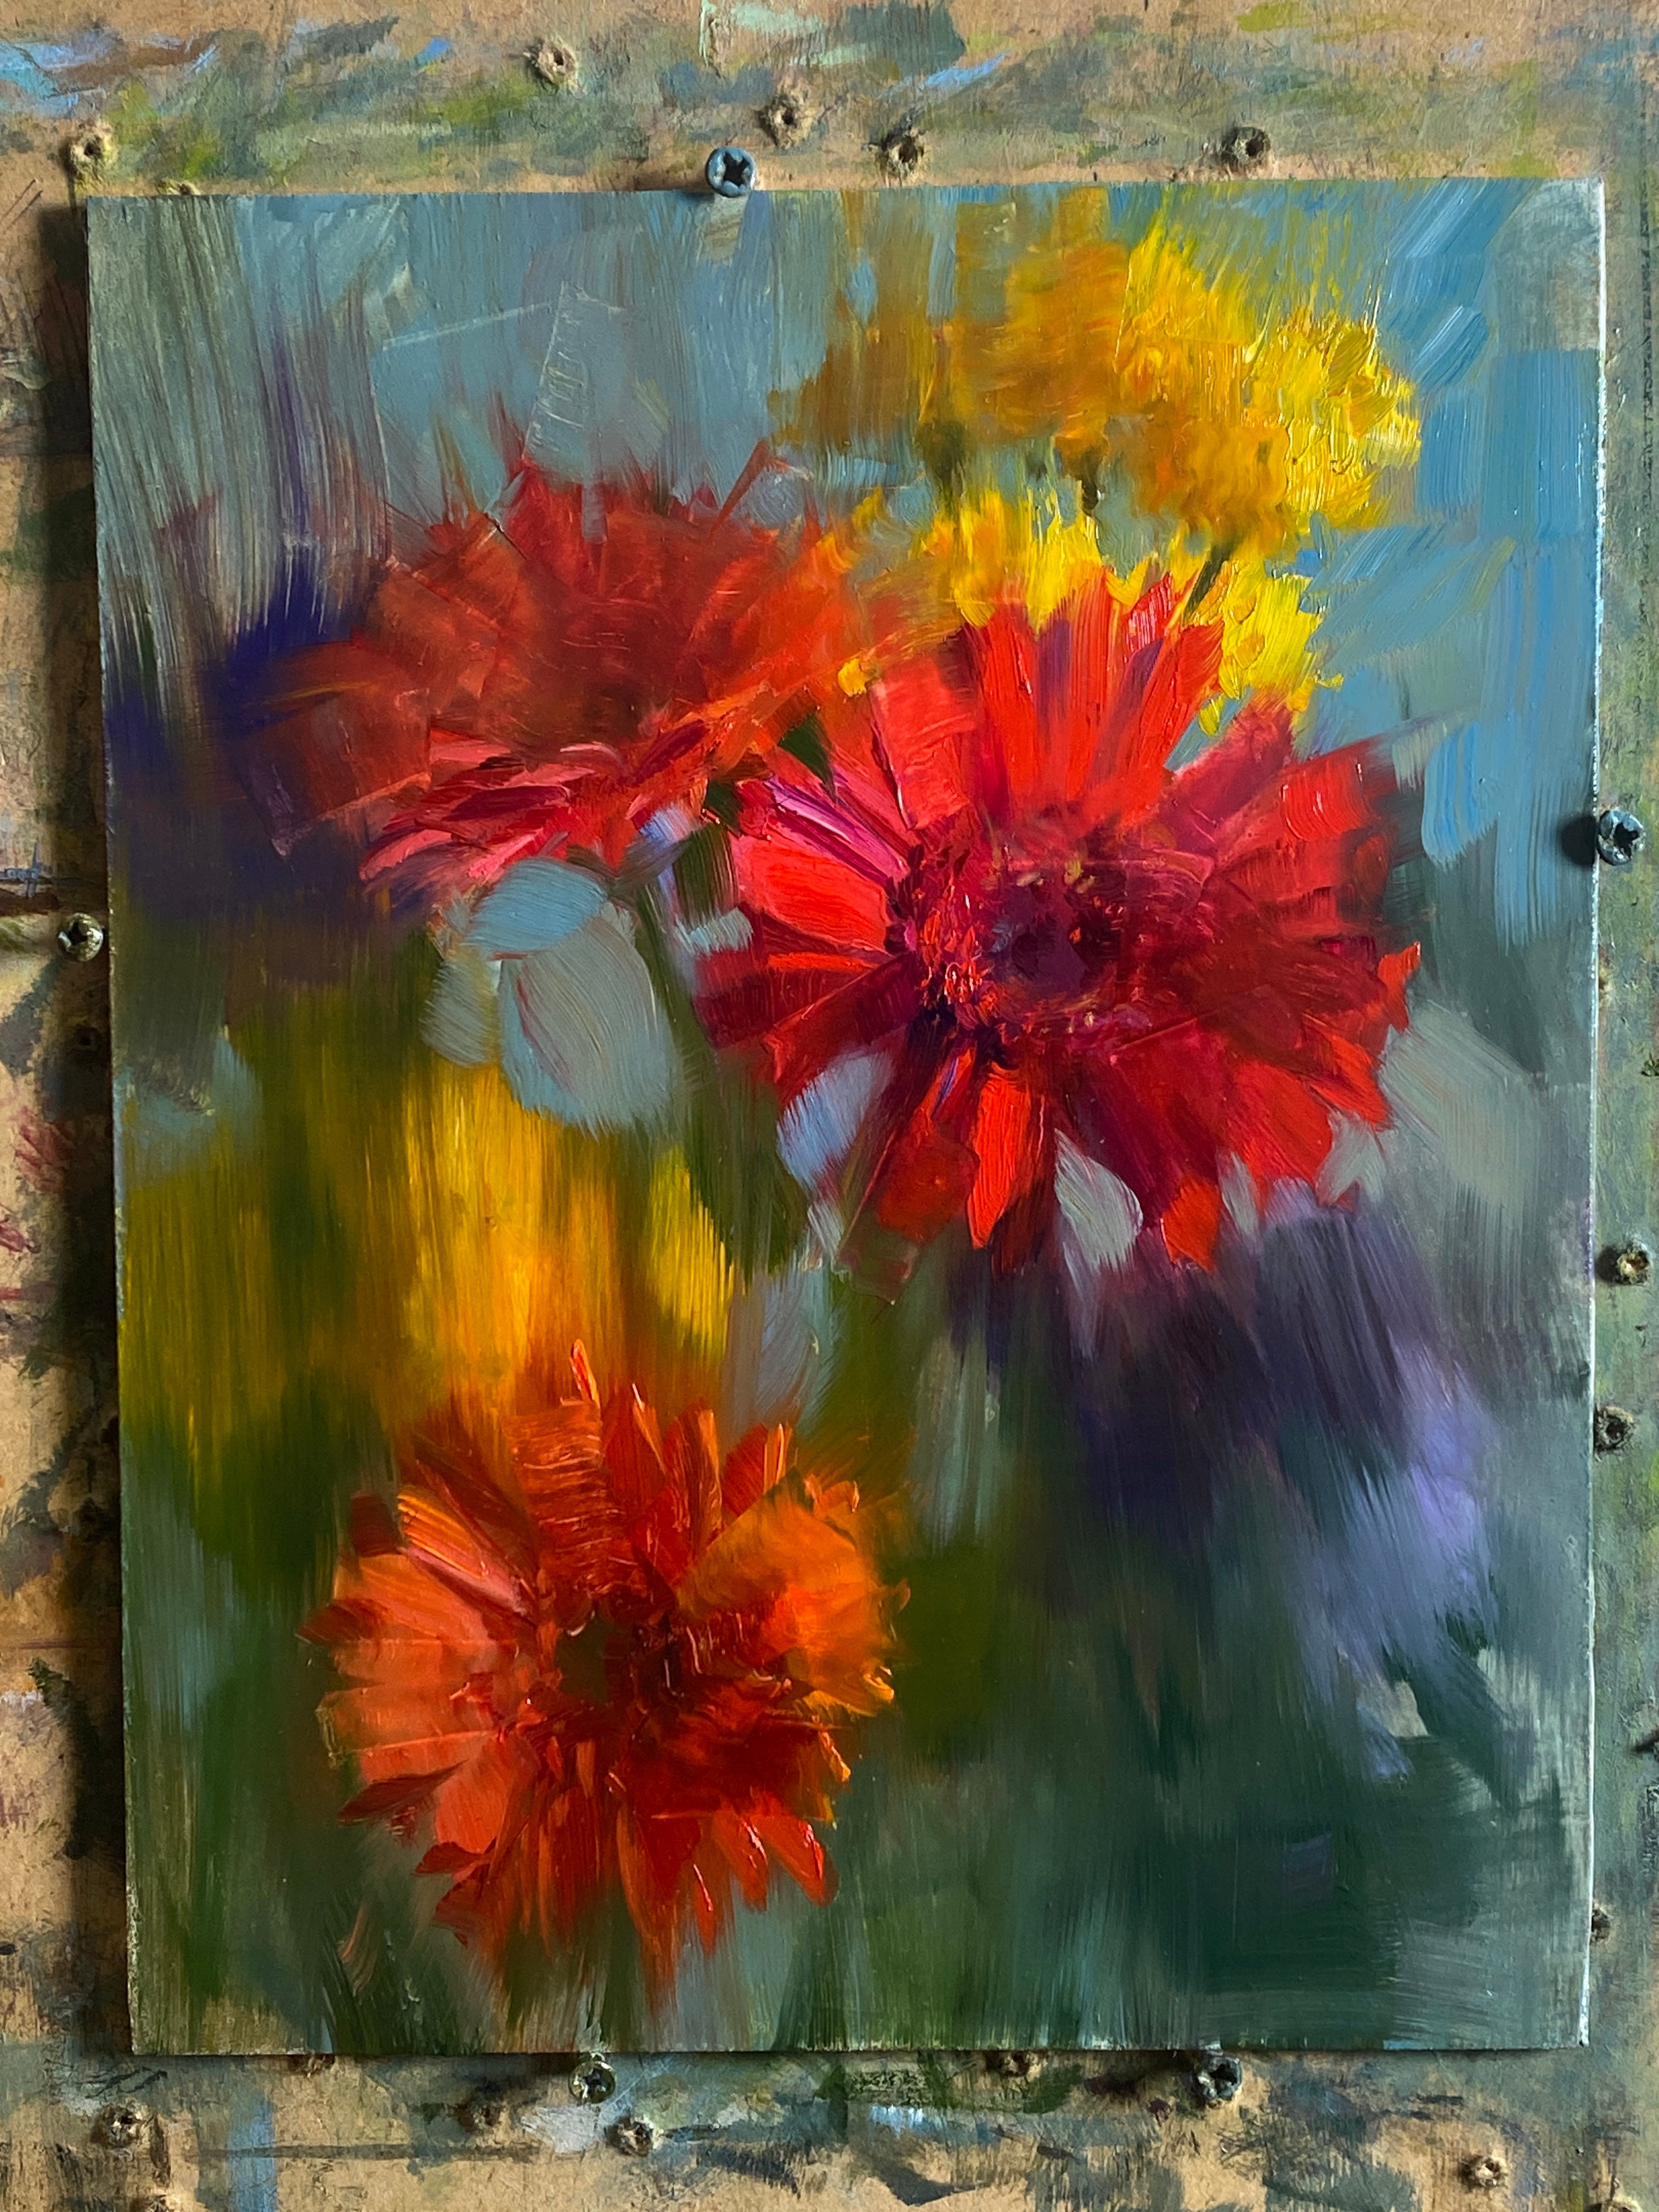
Above, you can see I've established most of the major colour shapes into light and shadow. The red and orange shapes in the light are close to the maximum chroma I can achieve with the pigments I have.

Above shows the block-in after being worked over with a soft, dry brush (Eclipse Comber). I've softened the majority of the edges but tried to retain the hardest edges visible when I squint at the real subject.
Now begins the process of laying down what will be the finishing strokes. You can see this on the red gerbera flower where I've begun to focus on defining smaller shapes. I pay attention to value, hue, and chroma relationships and try to avoid deviating too much from the larger pattern of lights and darks that I've already established in the 'blurry' block-in. At this stage, I also give greater attention to setting up appropriate edge relationships: hard > soft > lost. This is not arbitrary but based on carefully studying the relationships of the shapes I see in the real subject, both when squinting for values and edges, and with eyes open for hue and chroma. This is a good time to slow down and really try to understand what you are seeing.
This stage, to me, is one of the most demanding but also rewarding. It is what is so wonderful about alla prima from life: it's your direct experience expressed in paint. It's also why I often say work from life if you can. Working from photo reference is convenient and sometimes necessary for certain subjects, but it will never match the experience (for the artist) of working from life.
"My way of drawing and painting can be taught only through direct visual perception and it is almost impossible to describe it. An attitude toward painting and a few technical fundamentals can be discussed, however - but always with a warning not to take my observations in an overly literal or rigidly set manner..."
Nicolai Fechin
The process continues in the same manner for the next flower. The only caveat is that one should step back often to view the whole painting. It's all too easy to become focused on one area of the painting to the detriment of the whole.
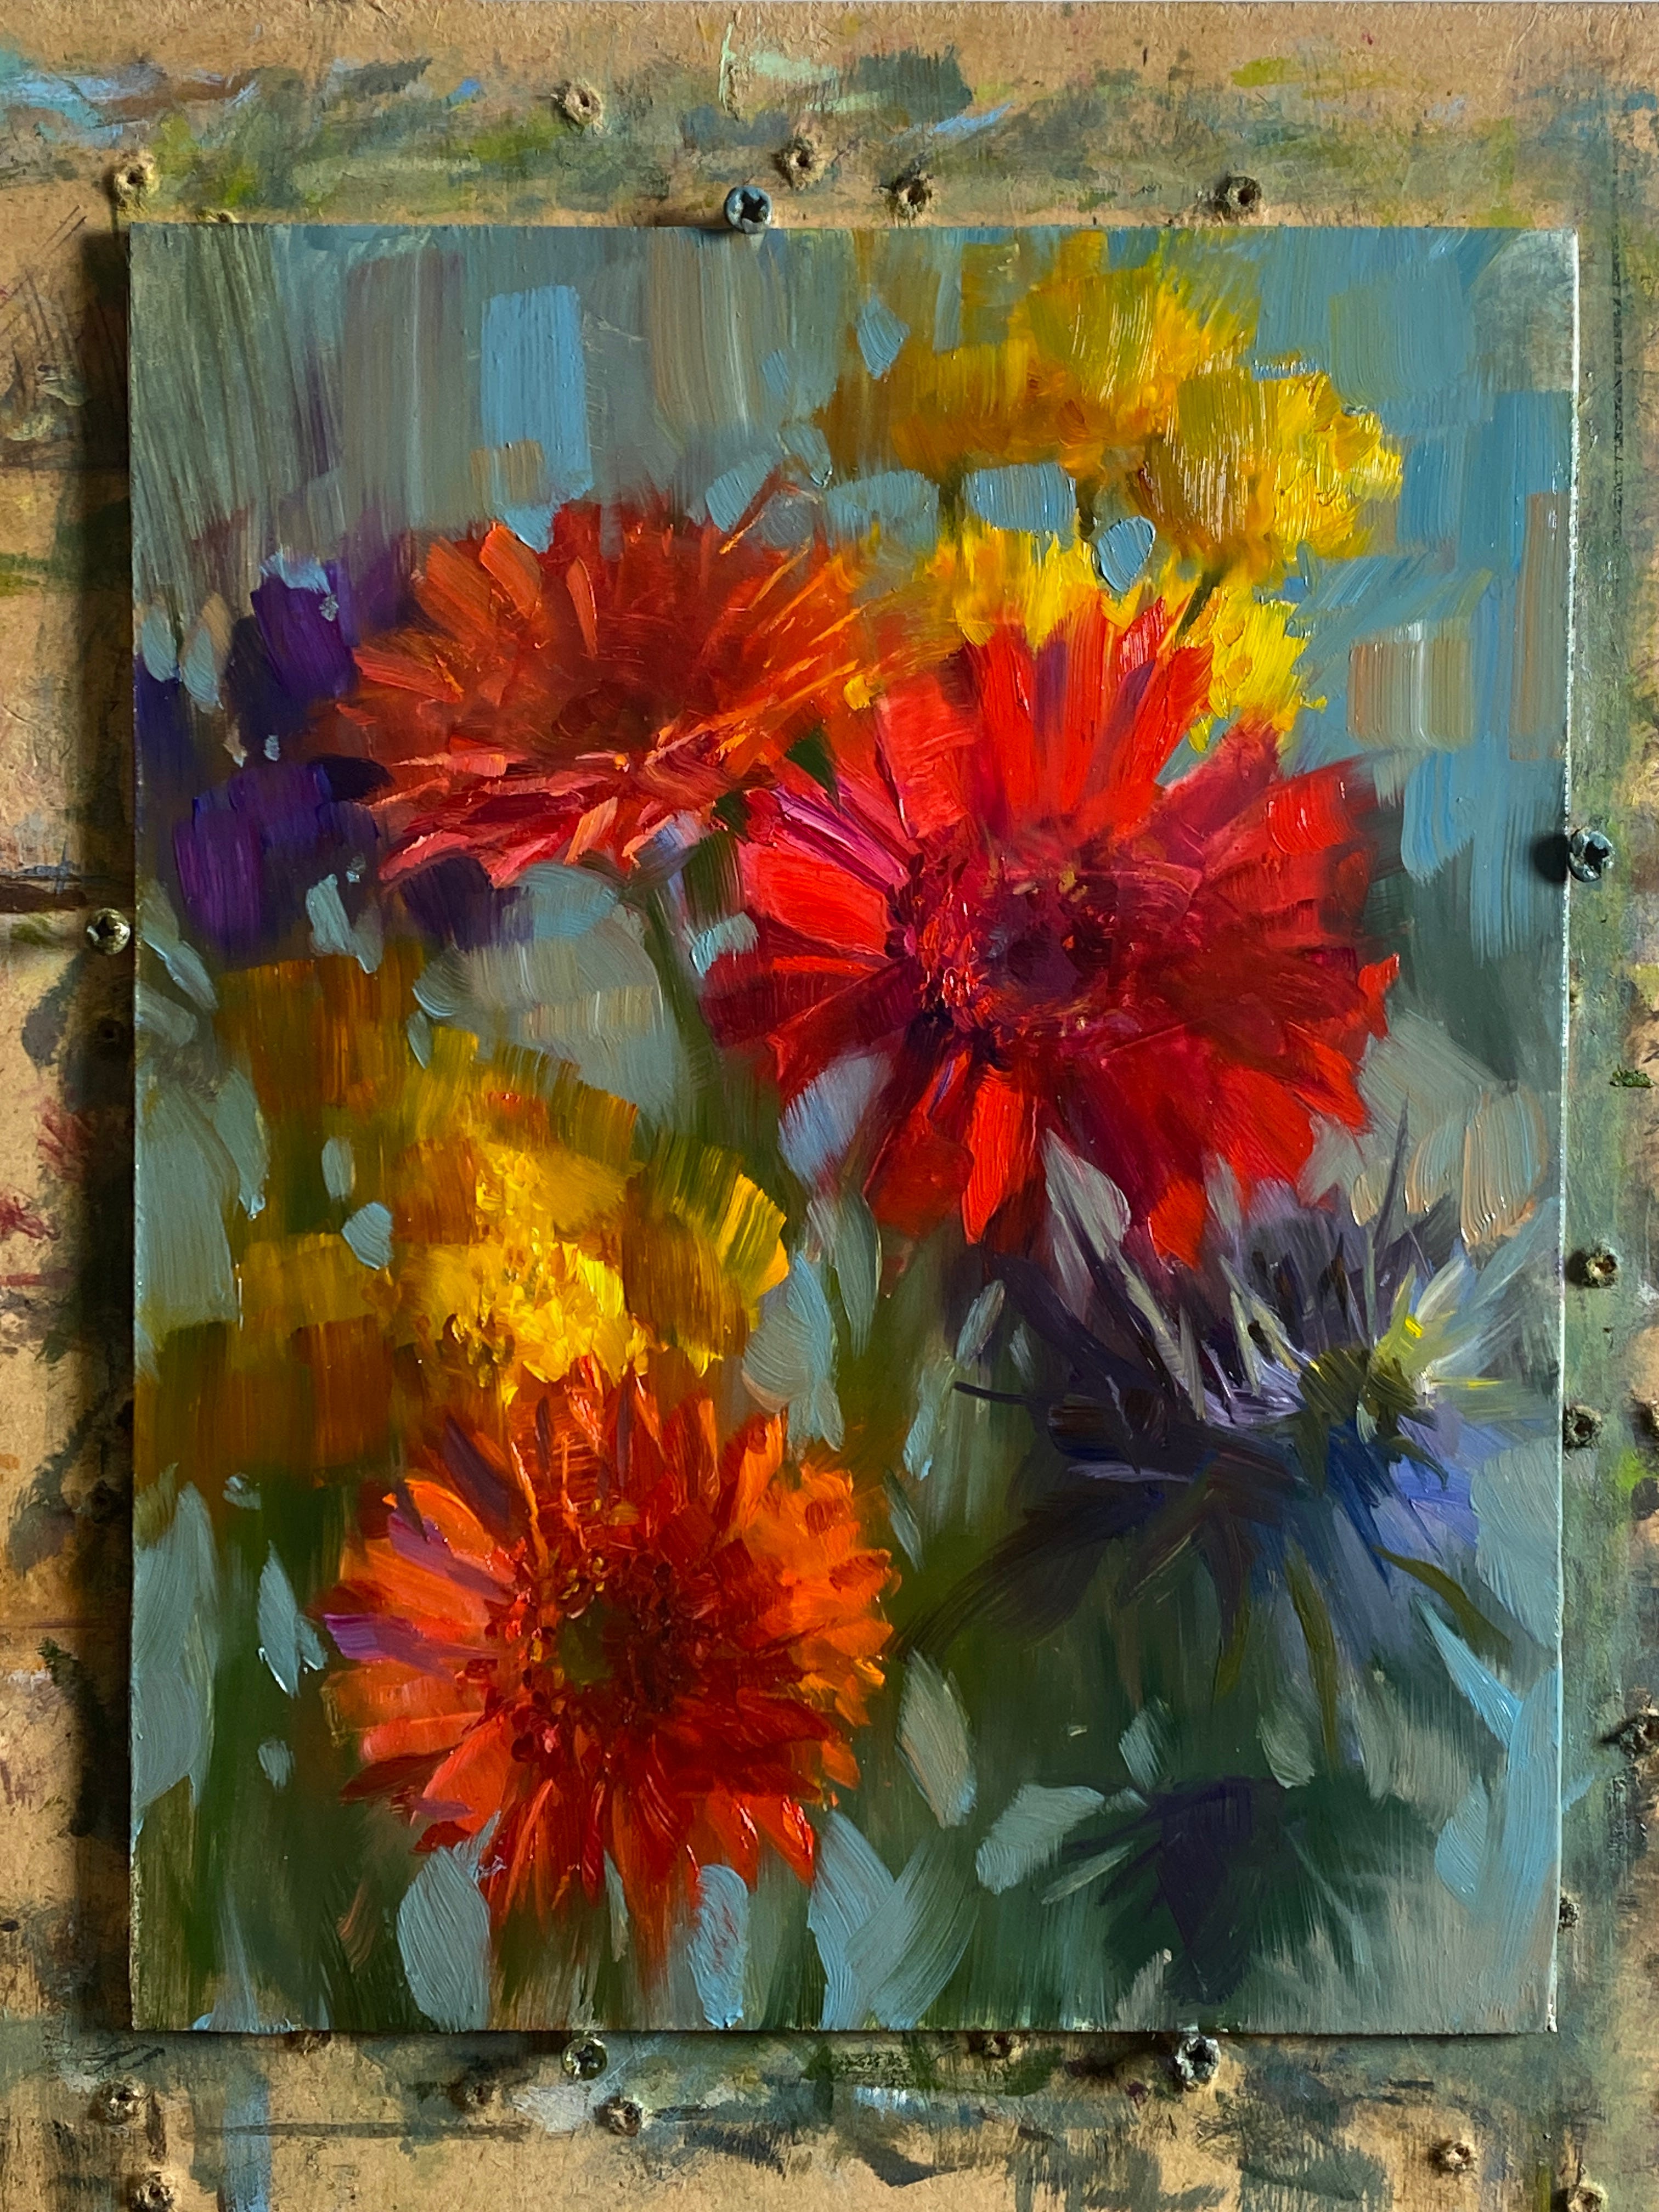
Getting near completion at this stage. I am refining the drawing/shapes by using the background to cut back into the foreground shapes. It's surprising how important a well-described silhouette tells you so much about form. Working in this way of step-by-step refinement, one has to have confidence that you can still refine the drawing at this late stage. I am also assessing where I want the most detail and where I should ‘sacrifice’ more highly rendered areas for the sake of the whole painting. I try to keep in mind the principle of harmony and variety.
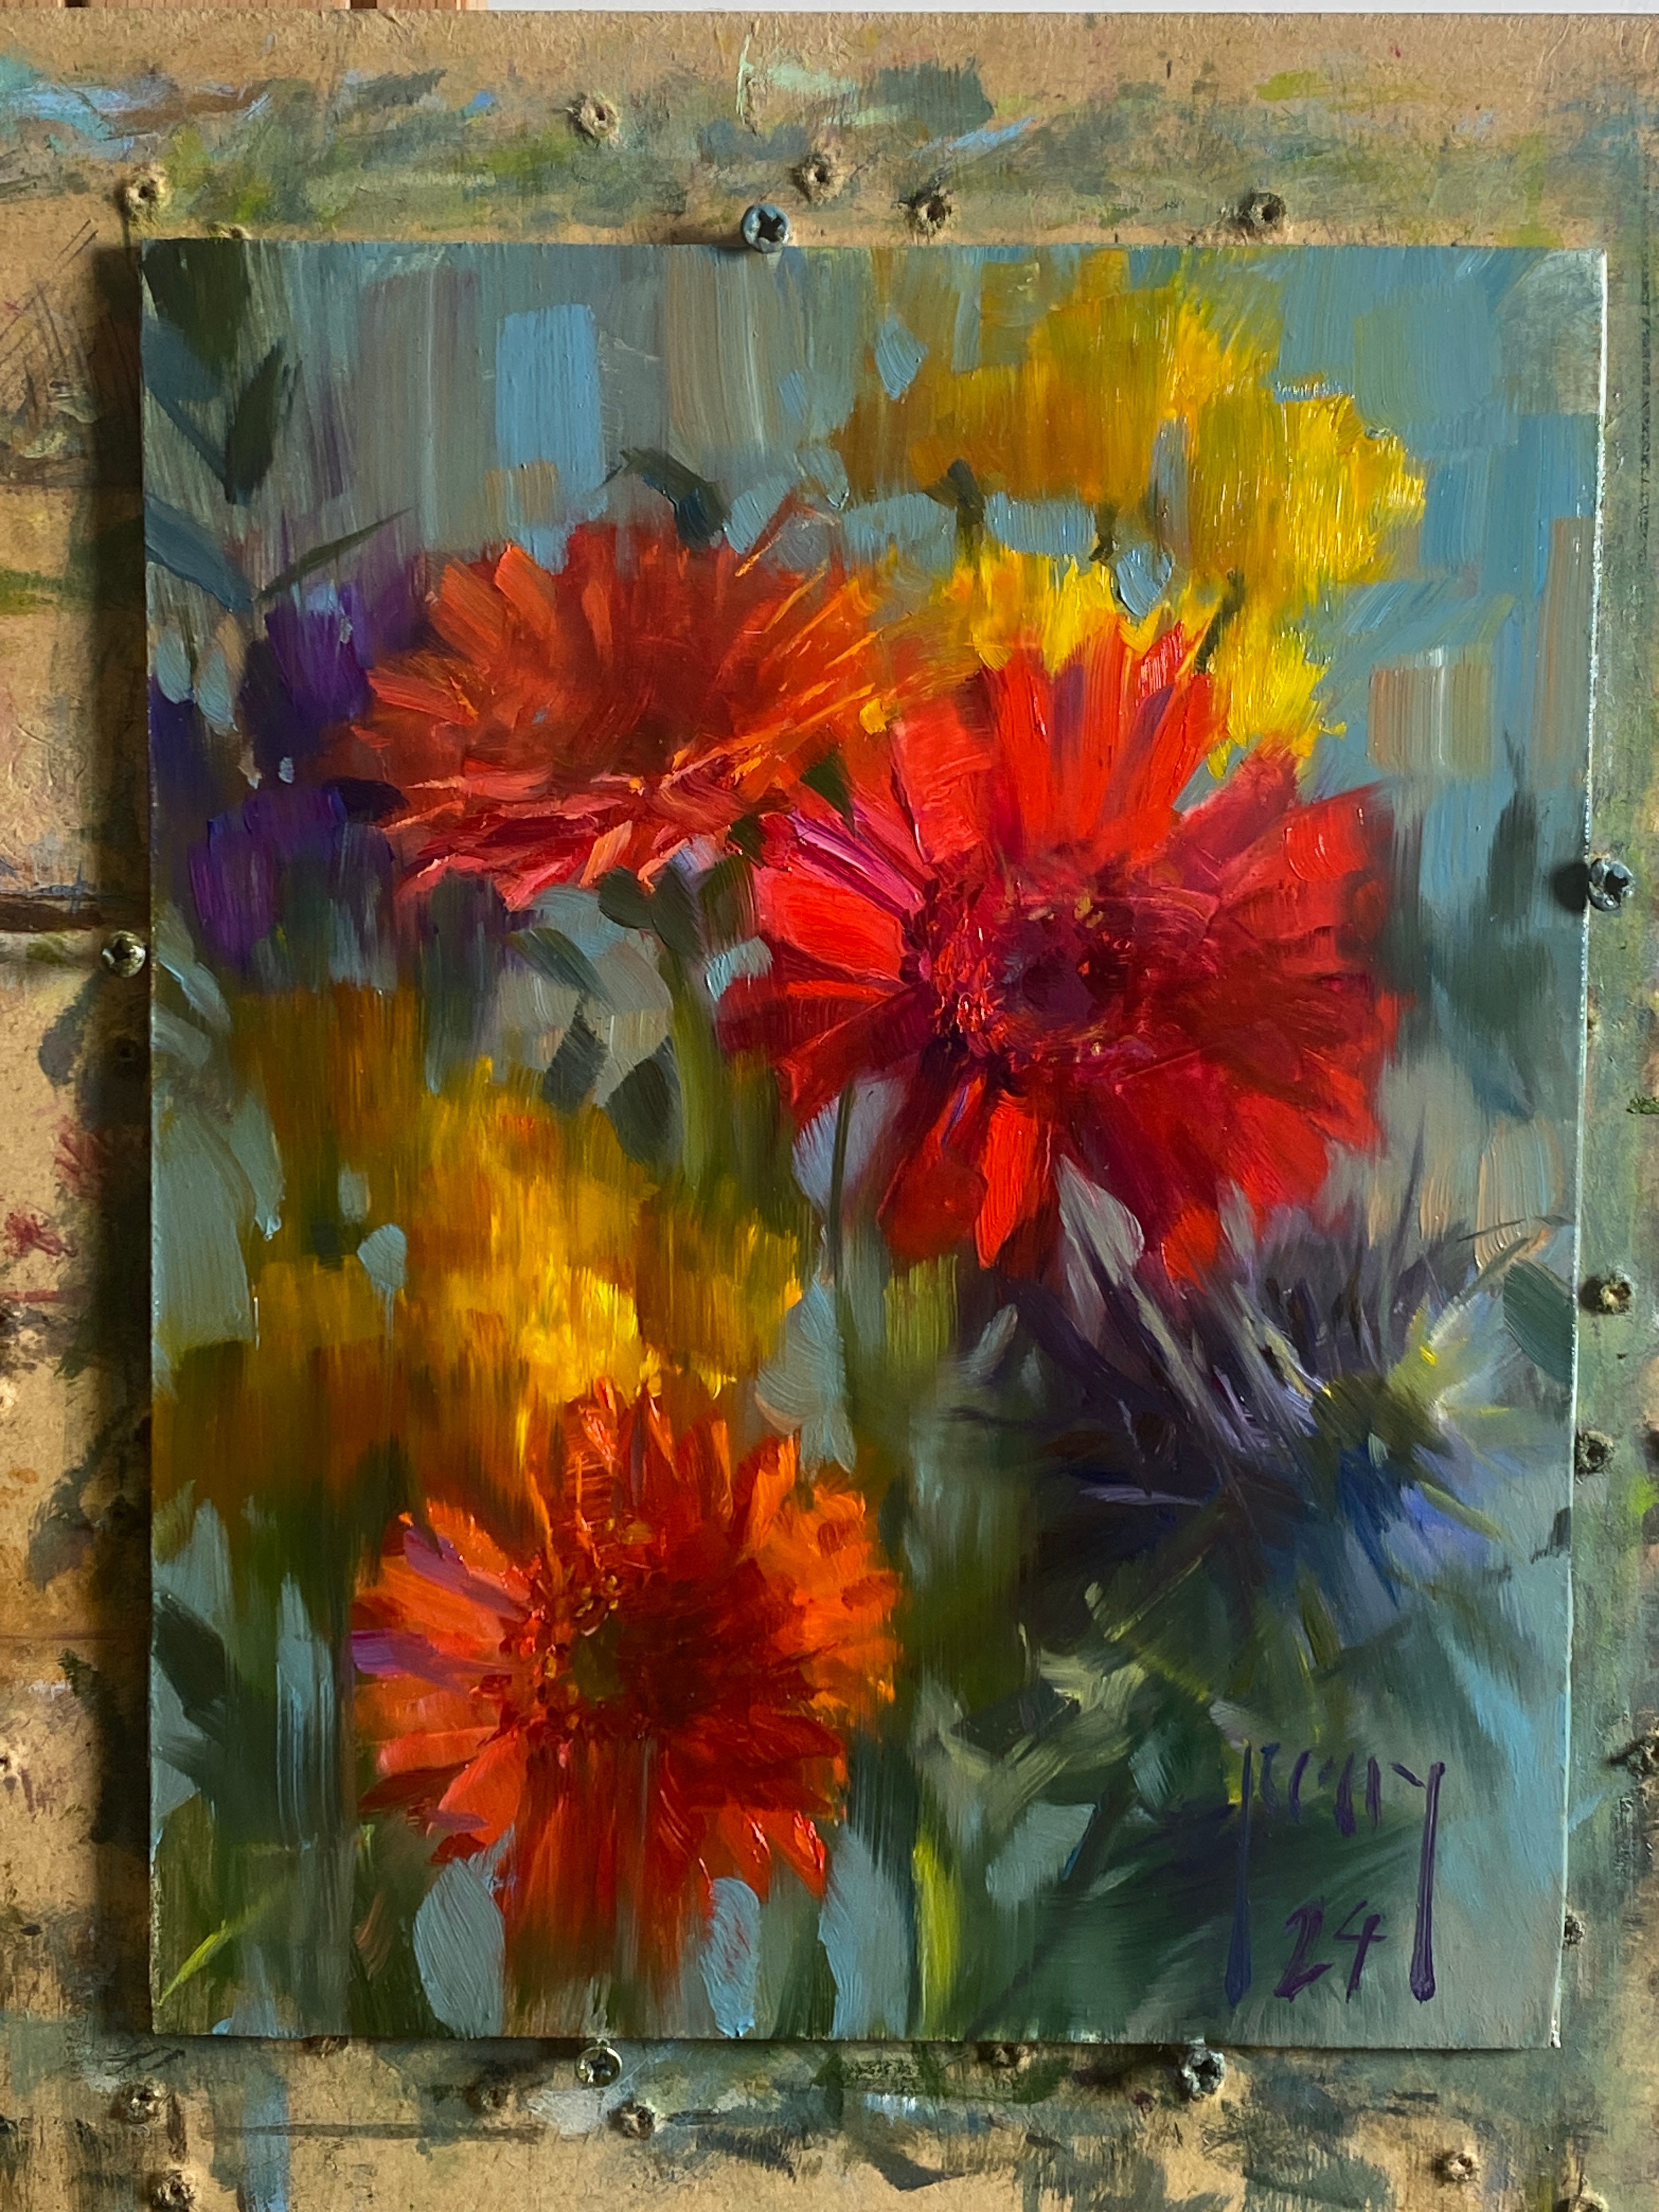
Above is the completed painting. If you compare it with the previous stage, you can see where some areas are ‘knocked-back’, particularly with regard to edges, so that the main focus can rest on the red gerbera in particular.
Thanks for your attention! I welcome any questions or comments.
Below is a video of the process with captions, which can be viewed if you are a paying subscriber.
Best regards,
Alex