


Low-pressure practice for when you're feeling uncertain
Low-pressure practice for when you're feeling uncertain

Dear Subscribers,
A couple of weeks ago, I mentioned that I was moving studios. Well, I'm still settling in (and probably will be for quite a few years!), but I now have a temporary space where I can work and begin the process of converting a garage space into a new studio. In the meantime, I've started doing some smaller floral studies and thought this would be a good time to restart sharing my process with you. After a painting break, I wanted to ease back in by doing some smaller, 'low-pressure' studies.
Here is the first of some daffodils which I repotted from our garden so I could bring them into the studio.
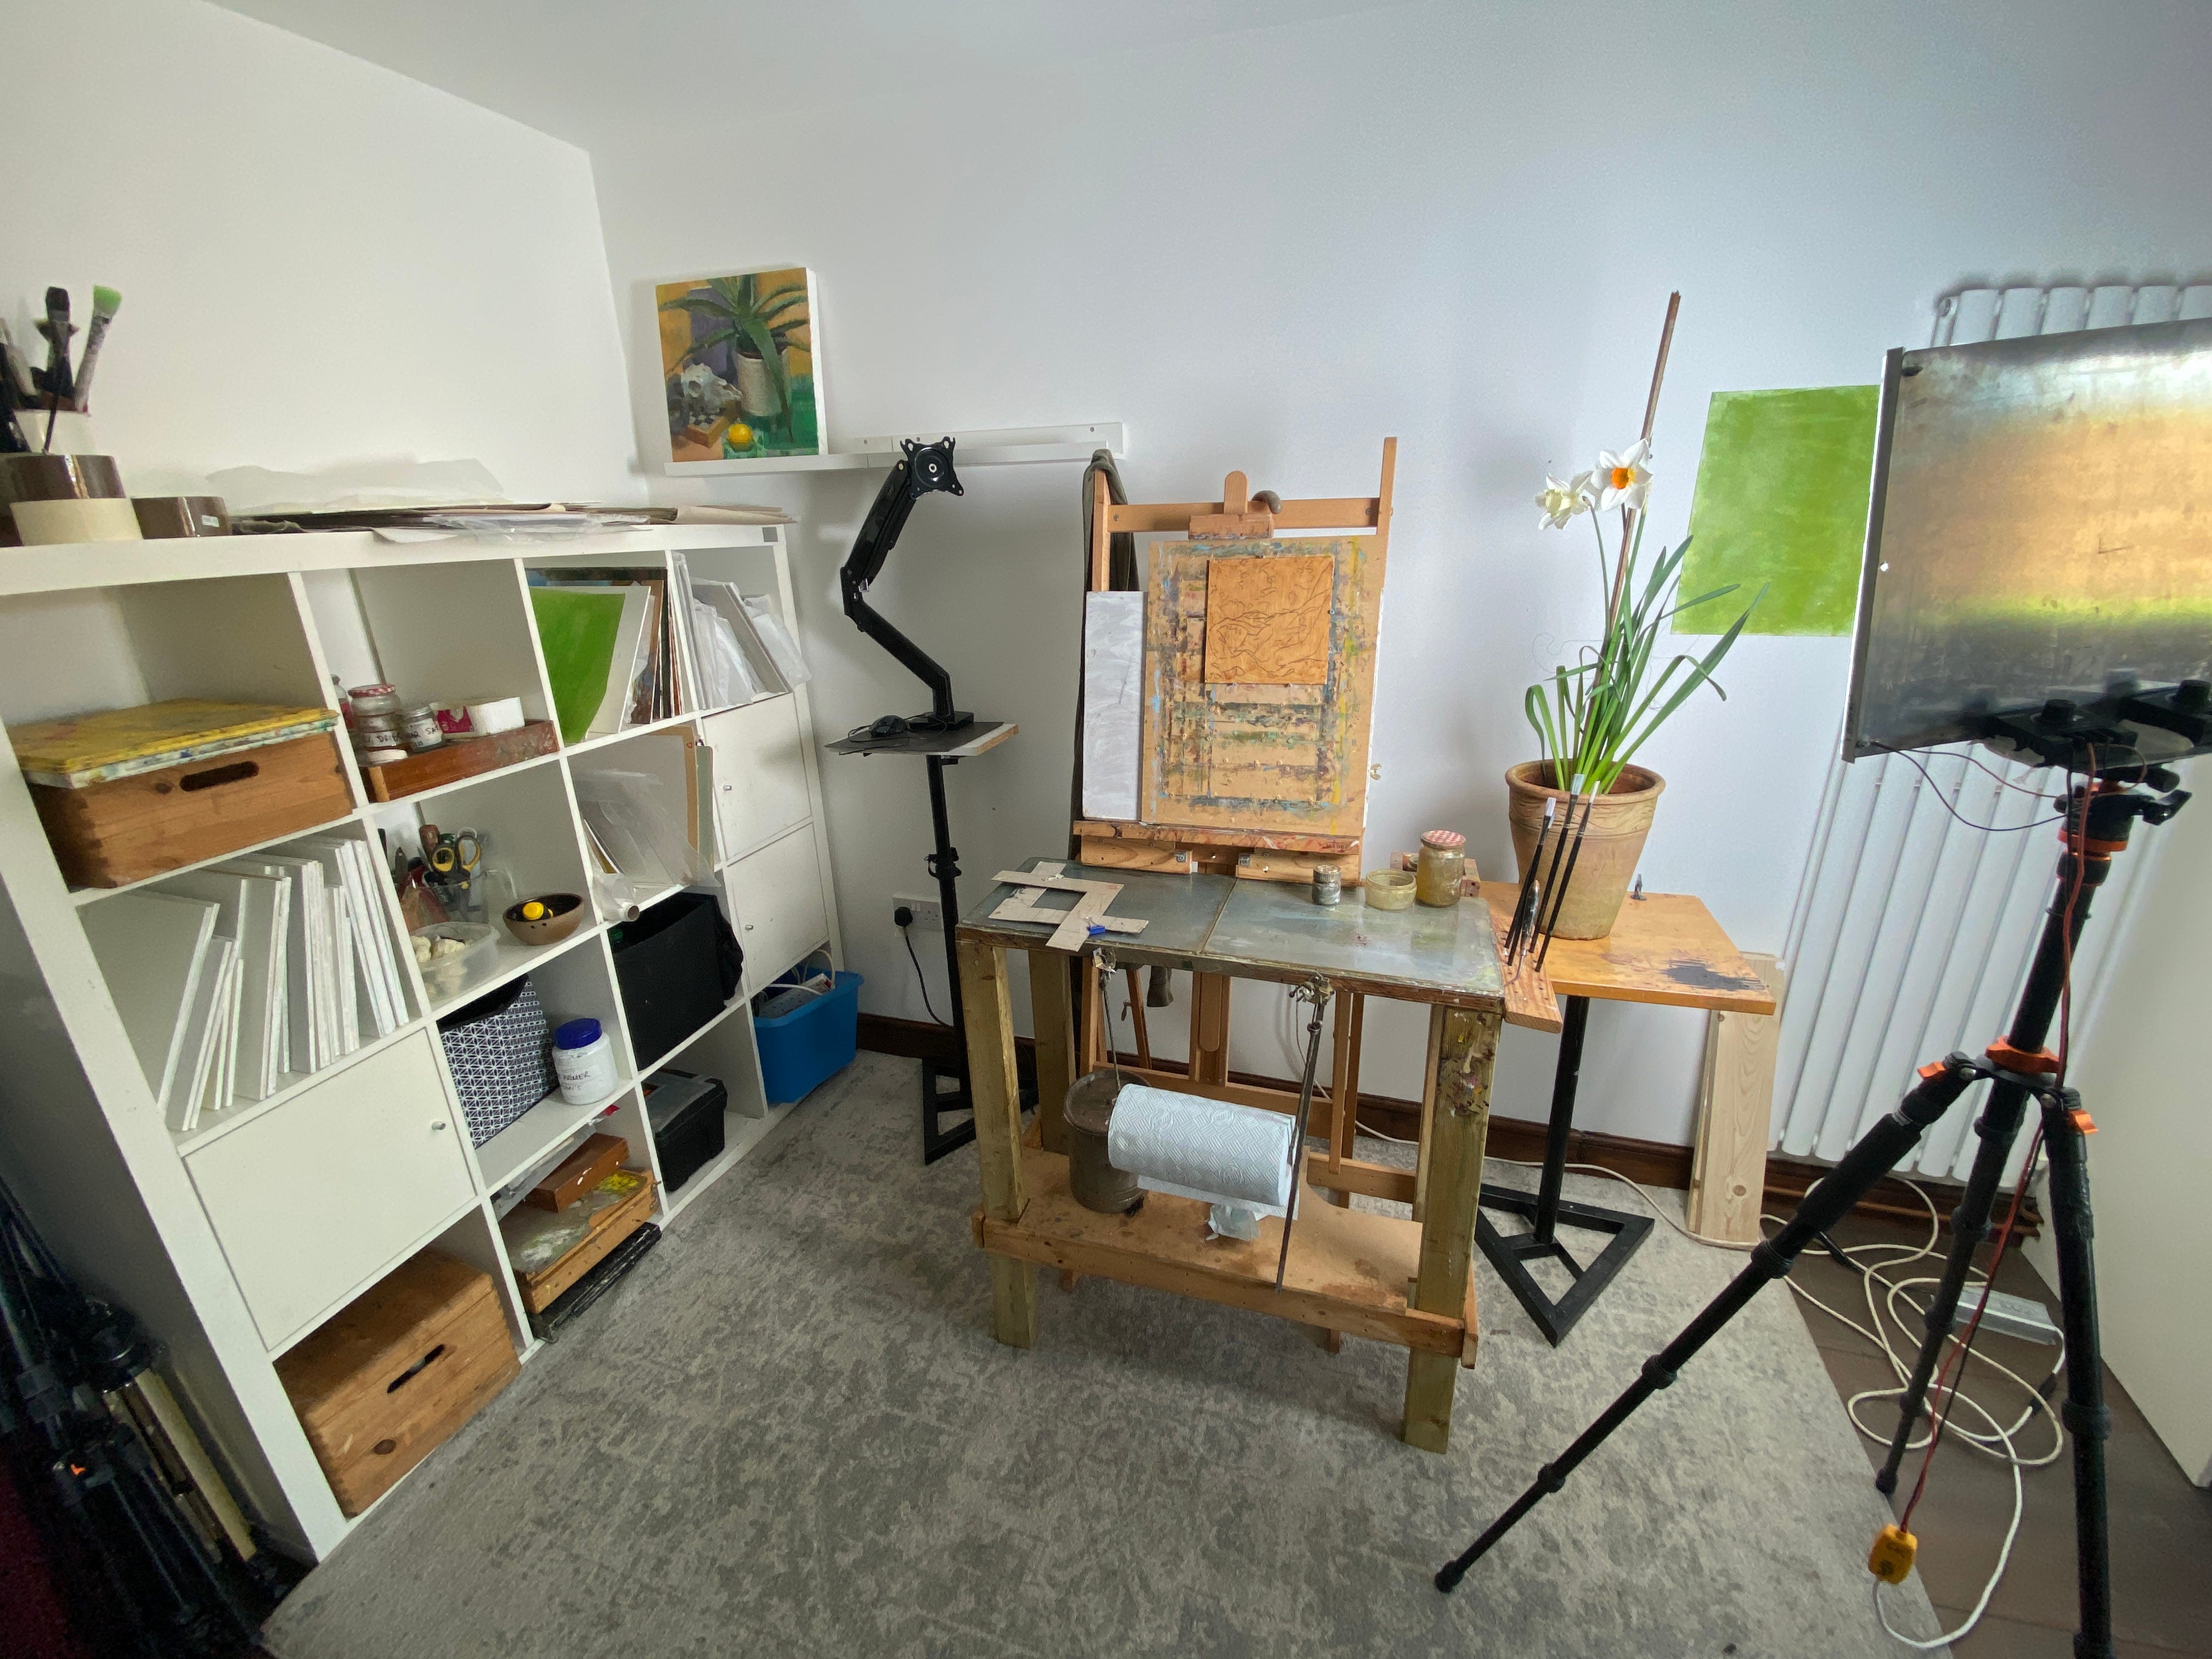
Above, you can see my temporary studio space, which is actually an area of our household utility room with the washing machine, etc. There is some nice natural light coming from the garden on the right, but it's not really strong enough to work by. So, I am supplementing it with my homemade LED panel, which can be seen on the right. I'm working on an oil-primed panel as usual. In the end, I didn't use the brown-tinted painting panel shown in the photo, as I wanted a white ground to build on. This allows for cleaner and more intense chroma reflection from the ground.

Above is a closer look at the subject. I had to support the flowers with a cane as the stems were so long they couldn't stay upright. I particularly like the orange-centred daffodils, but there was only one available, so I mixed it with some other colour variations.
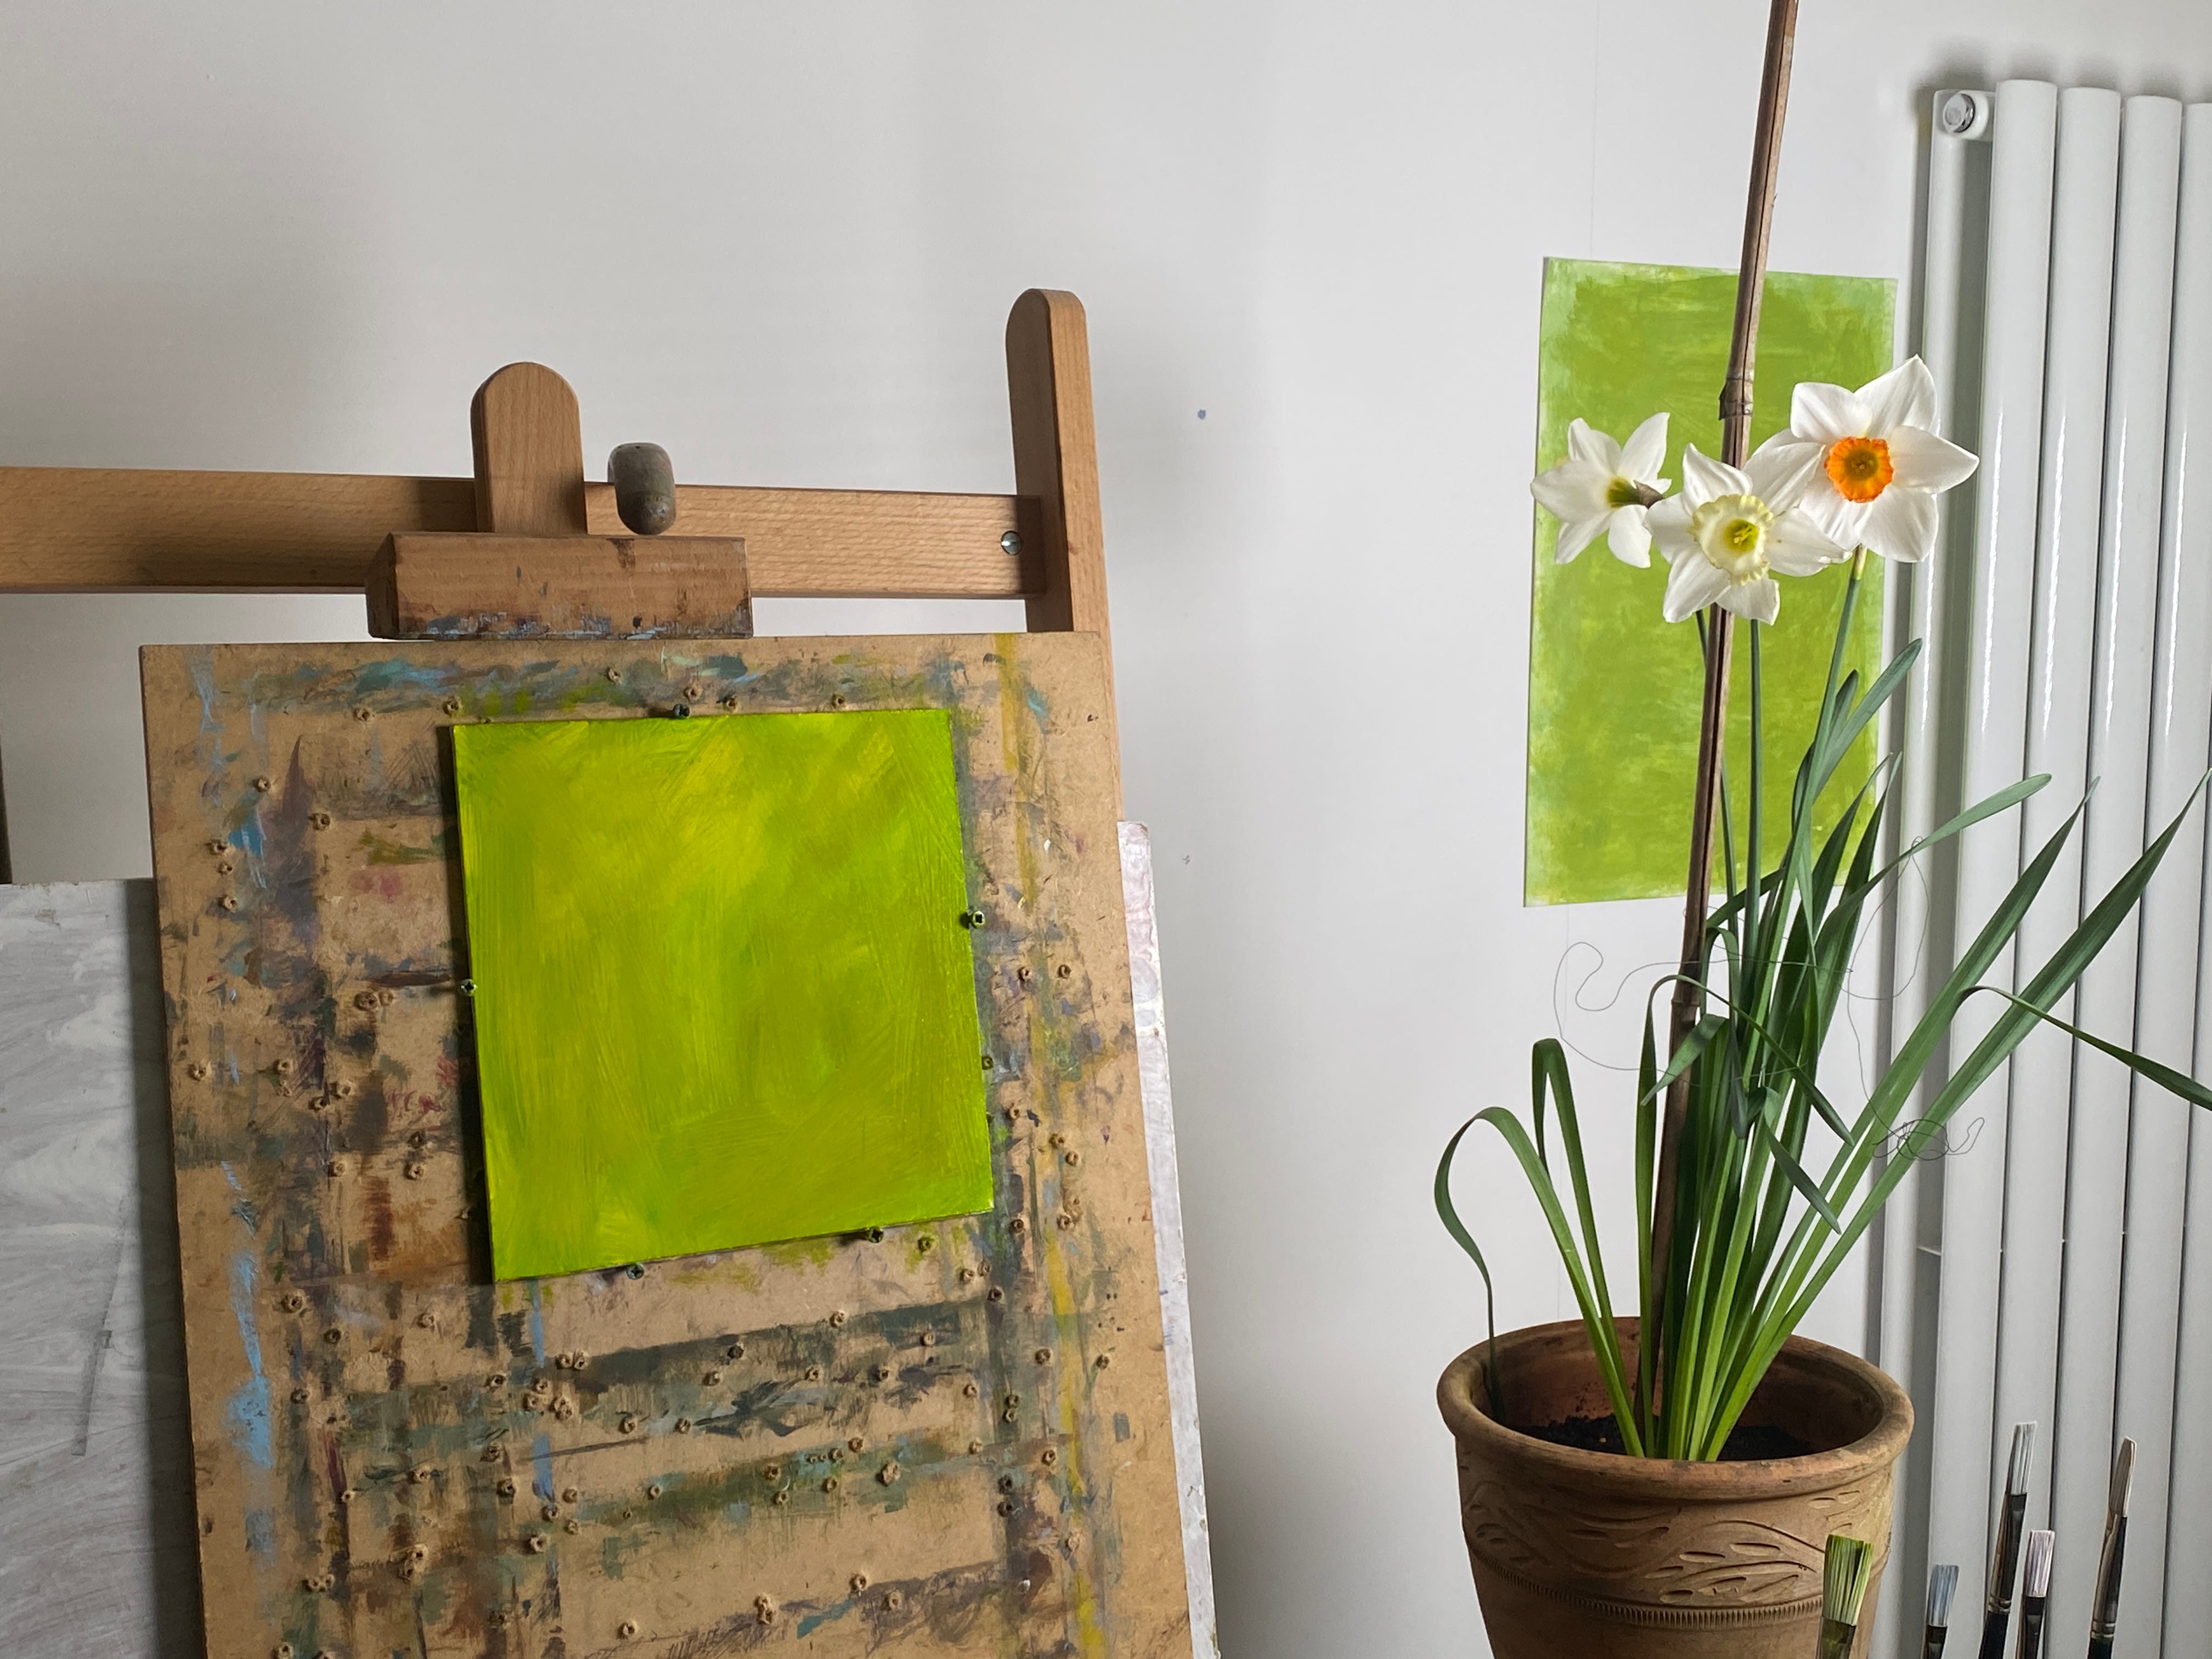
Above, you can see that I've tinted the white panel with a general high chroma green, which approximates the value, hue, and chroma of the background of the subject. Incidentally, this is a piece of card thinly painted with acrylic paint. My choice of colour for the background wasn't entirely arbitrary in this case. I imagined the daffodils against this kind of colour, influenced by seeing the spring green of the grass in the garden. If you can imagine the finished painting in your mind's eye before you start, it stands to reason you have a better chance of realising it. You then just need to work out a step-by-step strategy to get to that vision.
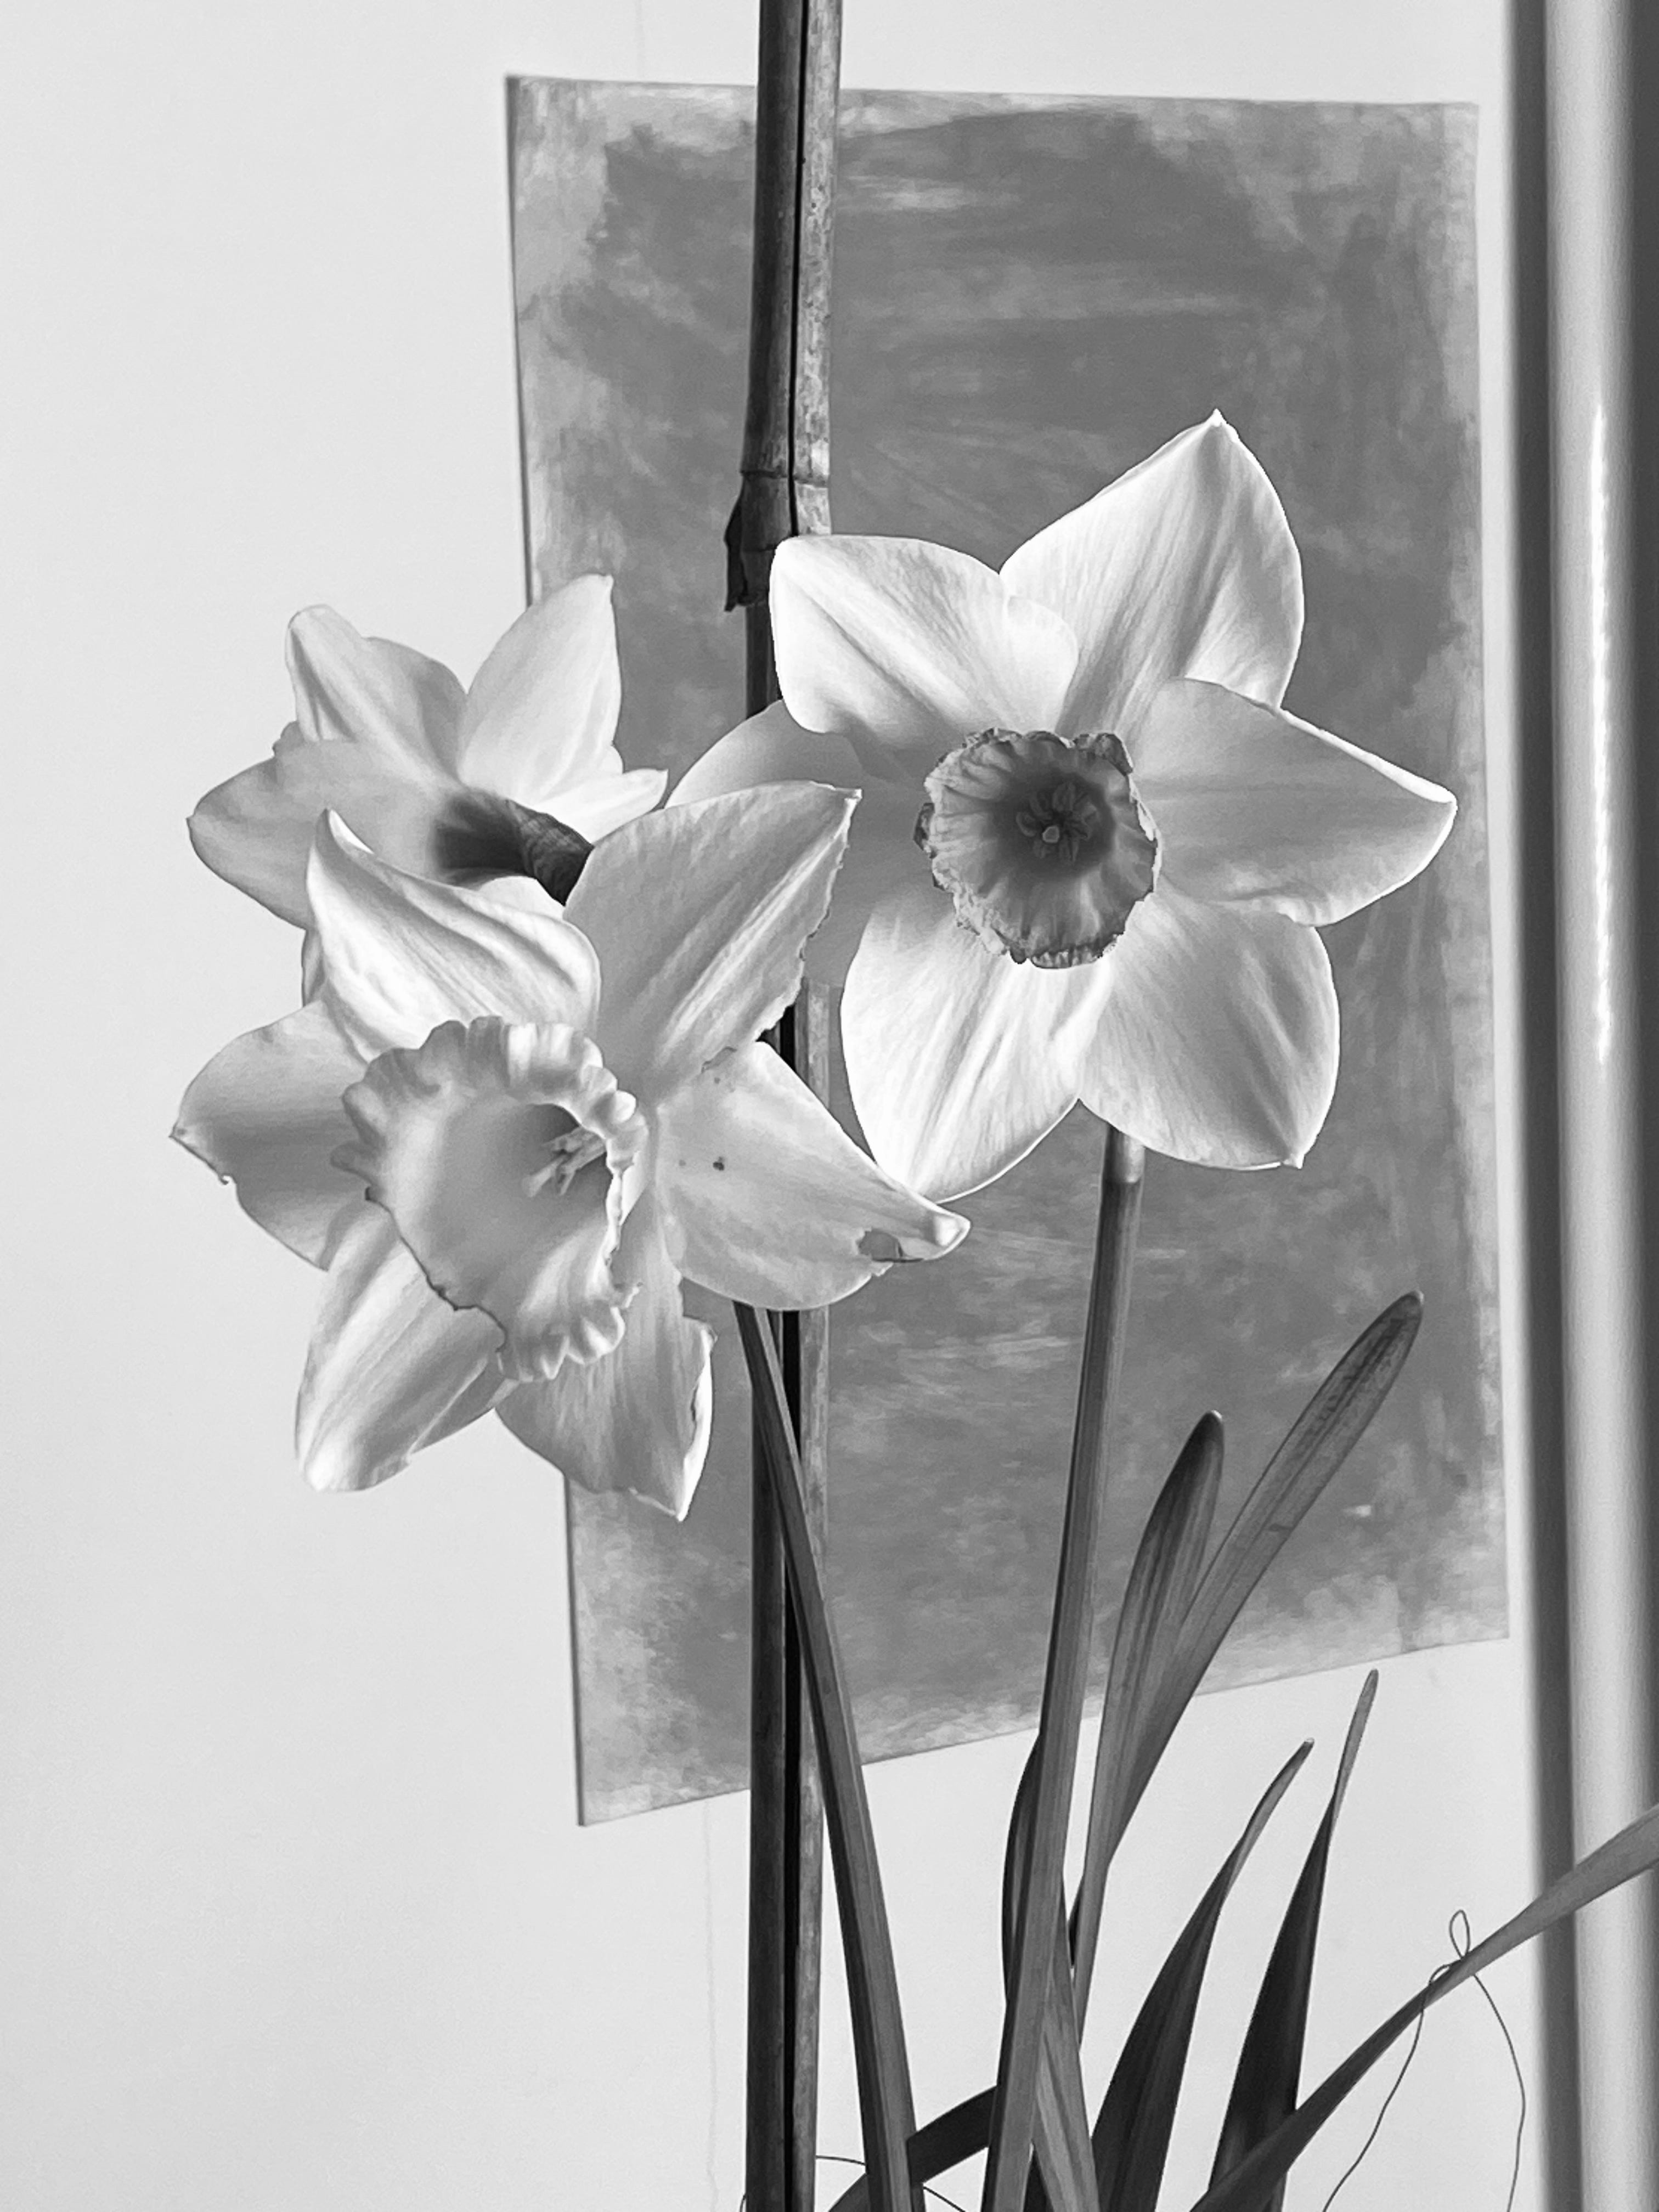
I was having difficulty judging the value relationships in the subject, so one tip I sometimes give my students is to take a photo with your phone and turn it to greyscale. This will give you an inkling of what is actually going on, though it shouldn't be relied on entirely, as cameras often distort the relationships in the three aspects of colour.
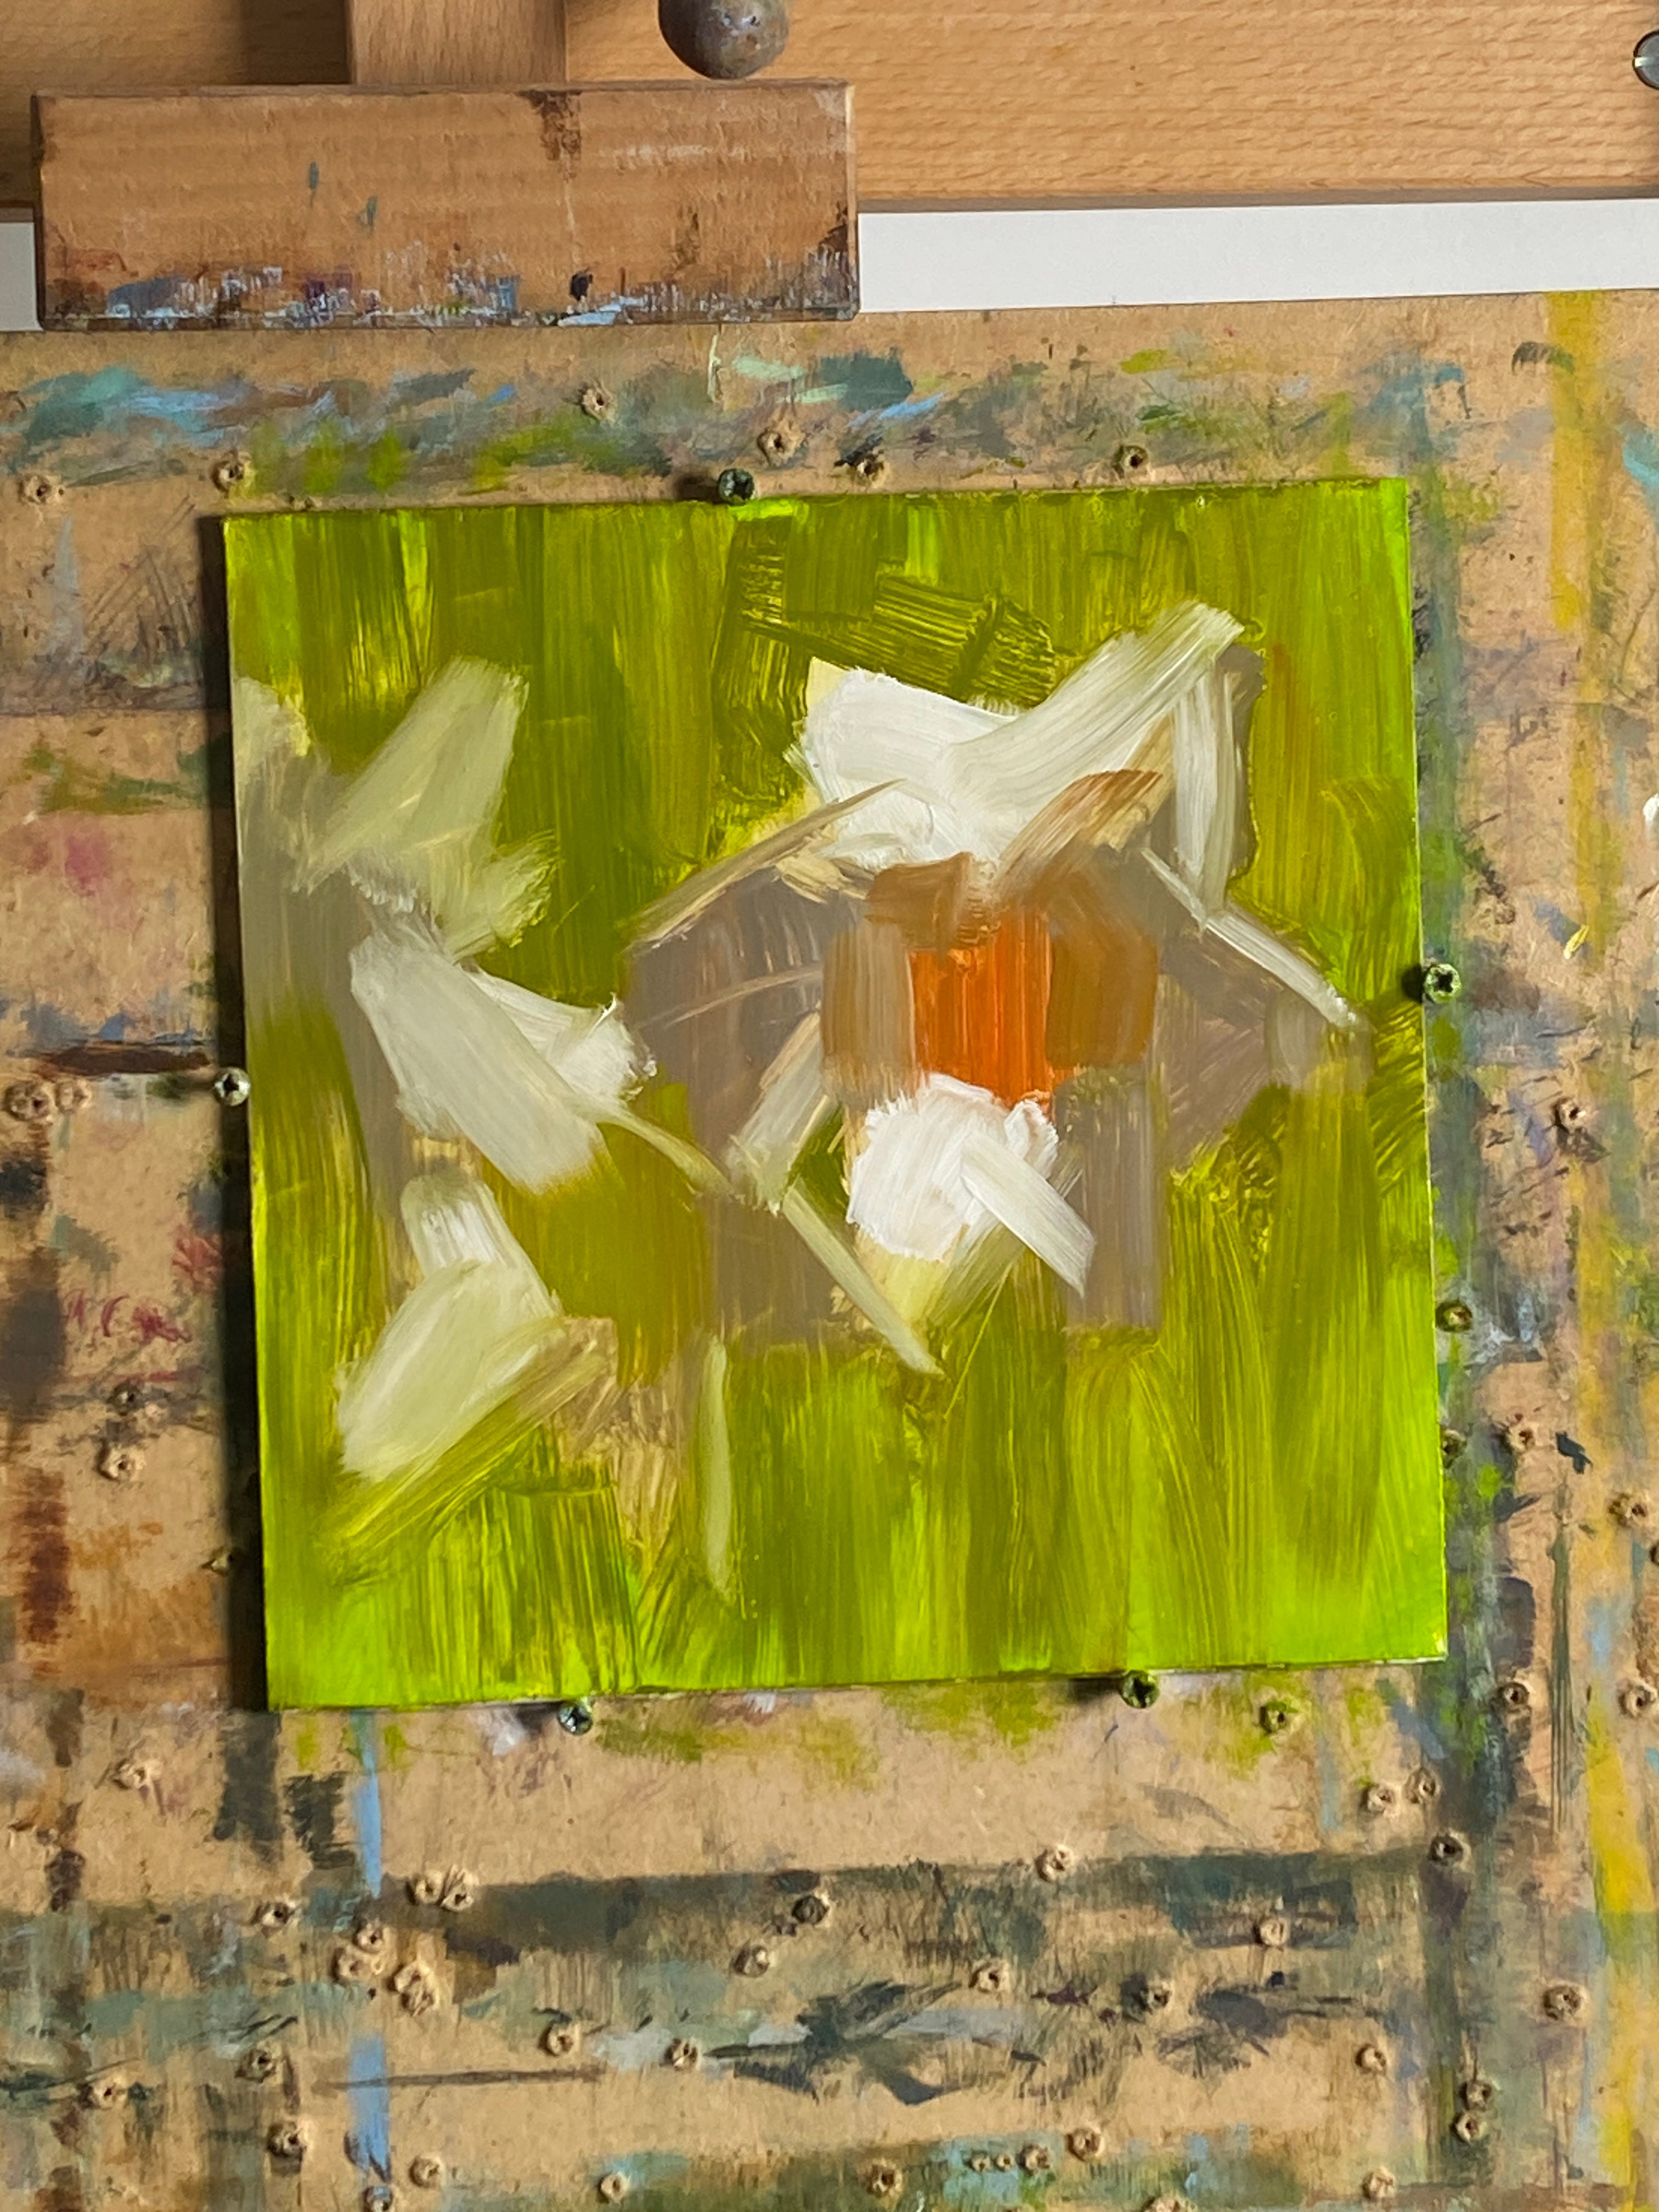
Above, you can see a generalized block-in, which is typical of the way I start alla prima work. The drawing is very loose at this stage. I'm just trying to get an approximation of shapes, value, hue, and chroma. I try to be as accurate as I can but accept that it's not going to be perfect. I know I will be correcting all those aspects as the painting develops. This stage can sometimes look a bit messy - you just have to stick to the plan (assuming you have one!) and keep building, organising in a methodical manner. I've indicated the main focal point, which is the orange blob, and I use a paper towel to remove areas where the lightest values will be. As these will be nearly pure white, it's going to be easier to apply fresh paint to areas without any underlying paint. White or high-value shapes are particularly prone to becoming contaminated by paint that is already on the surface.
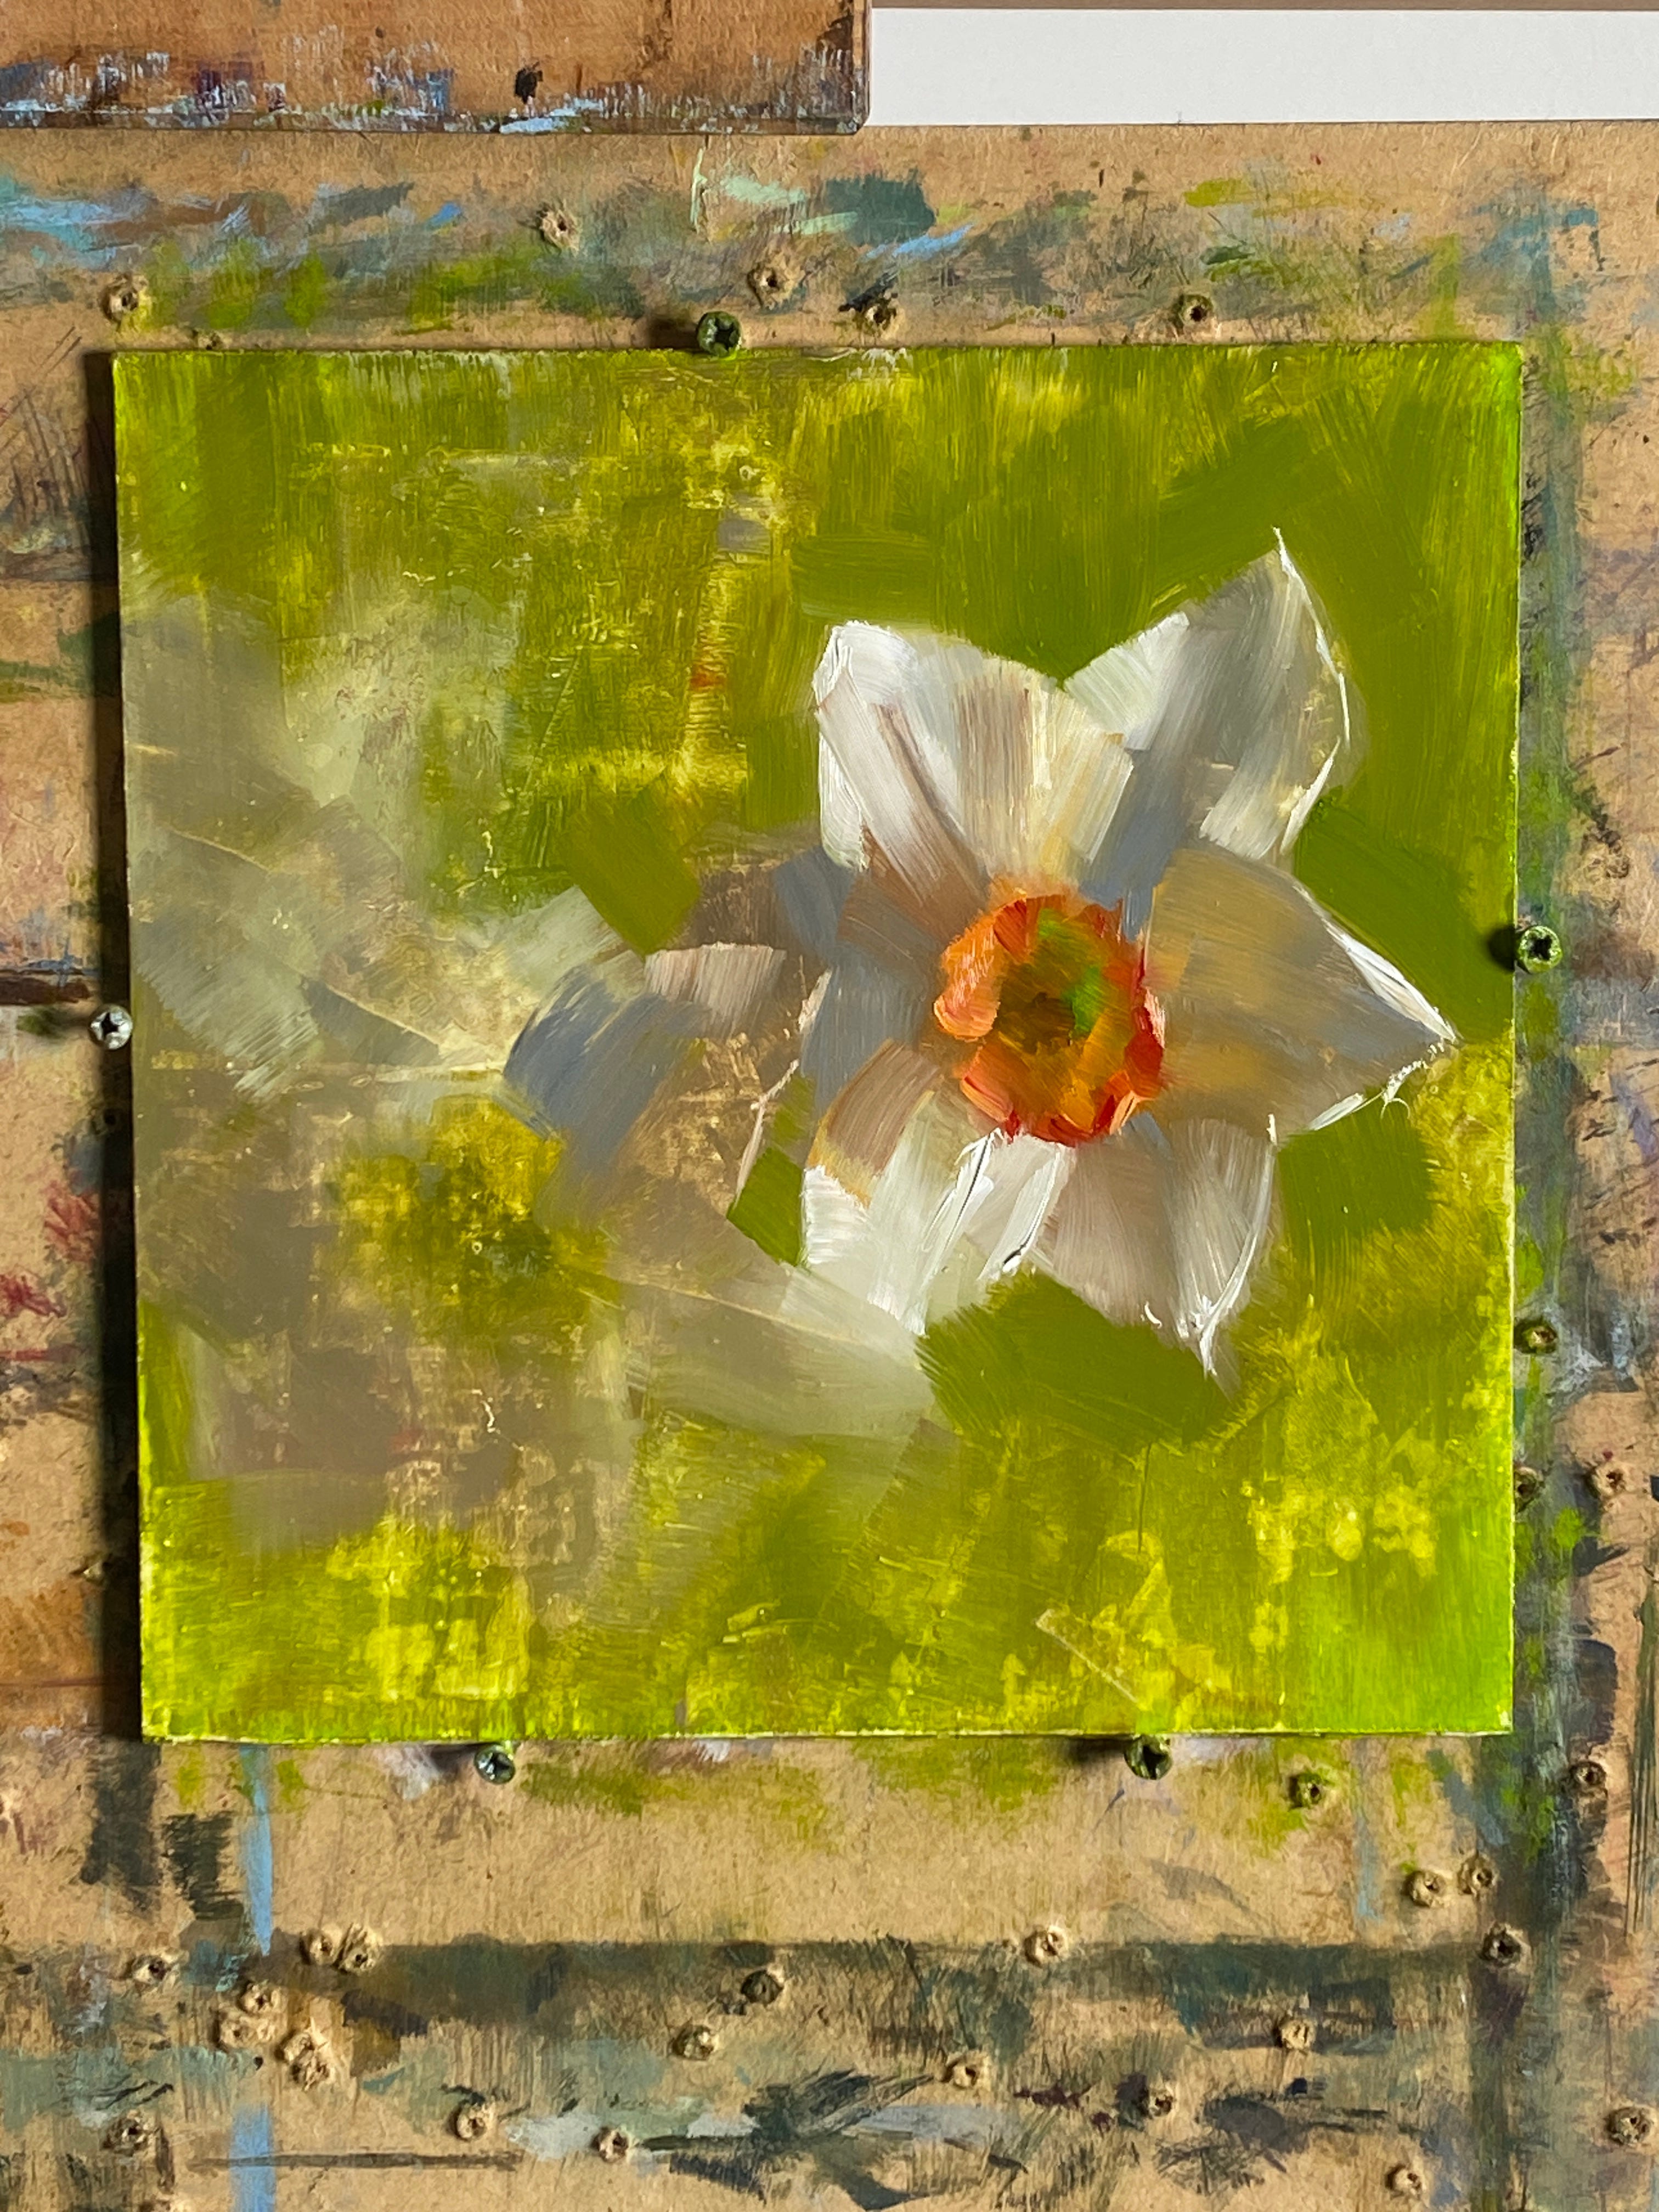
At the stage shown above, you can see that the main focal point is mostly in its finished stage. There will usually be some edge adjustments at this stage to get a range of appropriate edges, which is determined by closely studying the subject - often by squinting, which emphasises what range of edges are present. I like to get an area like this mostly in its finished stage so I've got something reliable to compare with as I develop other areas. I also try to be careful not to overwork all over the painting at this stage; otherwise, there is a strong possibility that the more abstract/interesting areas will be lost. I like to have a range of more tightly rendered areas alongside looser, more abstract areas as I feel this adds to the 'drama' of a painting as a whole.
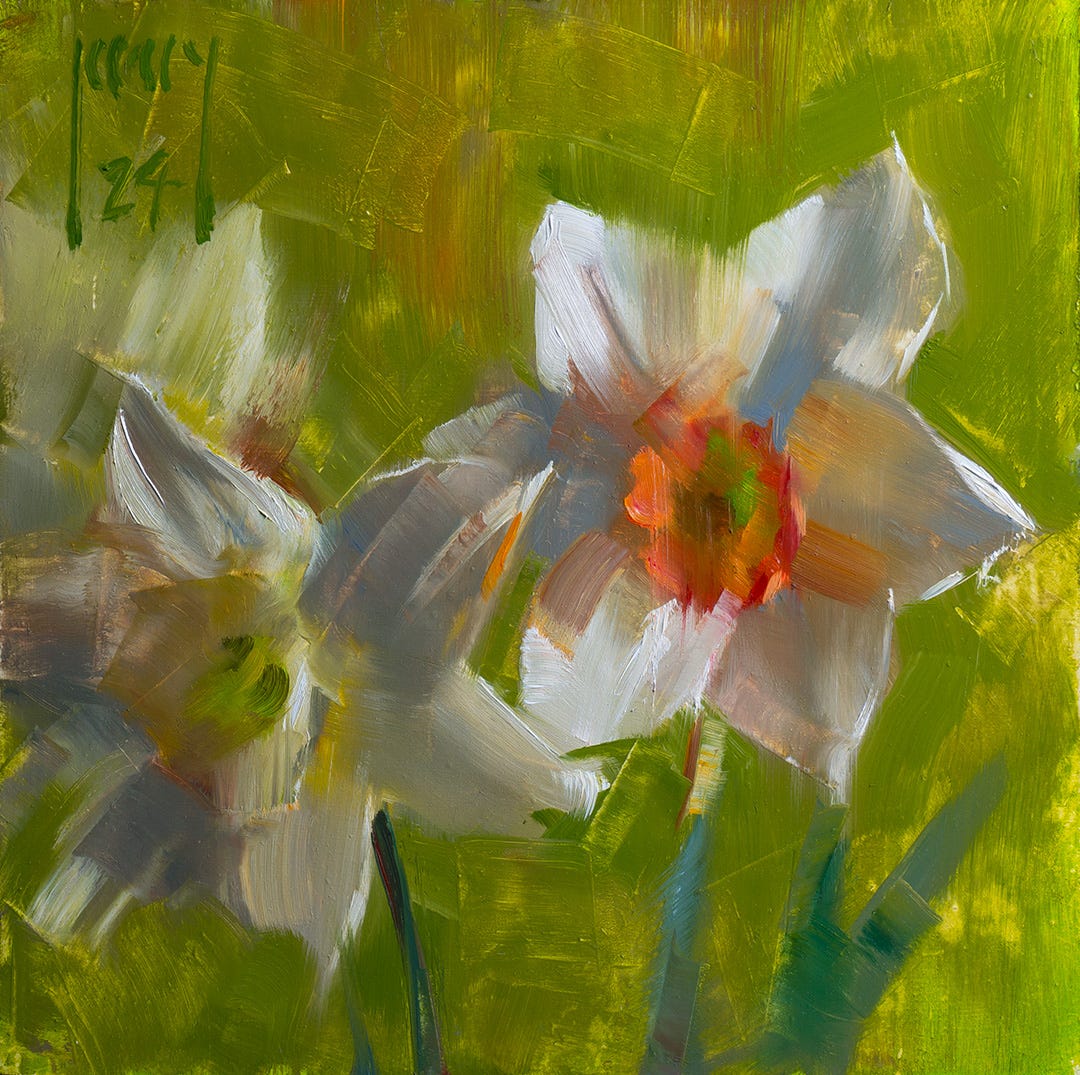
Above is the finished painting. I hope you found that interesting. Let me know if you want me to share another one next week!
Warm regards,
Alex
Thank you! So helpful!